
- SAP Community
- Products and Technology
- Technology
- Technology Blogs by SAP
- Explained: SAPUI5 Application Templates in SAP We...
Technology Blogs by SAP
Learn how to extend and personalize SAP applications. Follow the SAP technology blog for insights into SAP BTP, ABAP, SAP Analytics Cloud, SAP HANA, and more.
Turn on suggestions
Auto-suggest helps you quickly narrow down your search results by suggesting possible matches as you type.
Showing results for
former_member18
Explorer
Options
- Subscribe to RSS Feed
- Mark as New
- Mark as Read
- Bookmark
- Subscribe
- Printer Friendly Page
- Report Inappropriate Content
10-20-2015
4:30 PM
You might have already seen them in SAP Web IDE – two new SAPUI5 templates featuring two different SAP Fiori application patterns (master-detail and worklist). They have been created by one of SAP’s SAPUI5 teams to speed up application development and ensure code quality. And you can find them in SAP Web IDE, even with the trial account. By providing a running application as a starting point, they aim to reduce repetitive coding efforts across projects and improve code quality. By the same token, developing templates always means keeping scope as small as possible to not force developers to delete lines of code after generation. Balancing these two design principles was a key aim when creating these templates. The coding itself has been tailored to fit all requirements involved in creating SAP Fiori applications (e.g. SAP Fiori launchpad integration). And the templates even come with a full-blown testsuite setup and first tests for easy integration into your continuous integration environment.
The only things to be considered as prerequisites are application data via an OData service and a full SAPUI5 library. For testing and first steps, you can use the SAPUI5 library included in SAP Web IDE and mock your application data using the mock server that’s included in SAPUI5 and fully configured to run with the templates. So let`s quickly run through the process of creating a new application based on the templates using just a few wizard steps. After that, we’ll have a deeper look at what they provide feature-wise to be able to better assess the value add of these two templates.
New Project from Template

The templates can be found in SAP Web IDE. If you don’t yet have an SAP Web IDE trial account, read this post to find out how to get one (first two paragraphs explain the on-boarding). In the menu bar, choose “File” then “New” -> “Project from Template” to open step one of the template wizard, which asks you to select a template. Watch out for SAPUI5 prefixed application templates with the shield-icon on the tile in there. Now select the SAPUI5 version you want to develop against. This ensures that the relevant features available in the selected SAPUI5 version are included in your template coding. For the rest of this article, we’ll be using the master-detail template and version 1.30.
The next step asks for basic application information, so just enter a project name. This will later be the name of your project folder in SAP Web IDE, meaning it should be unique. Click Next to move on to the Data Connection step. To keep it simple, you can use any OData metadata.xml file for testing. You can download and use the file in added to this post if you don`t have one available. If you’ve already configured a destination to a back end, you can of course also use this here by selecting the system.
In the final step, you can then customize your template. Two sections are offered here. First are your “Application Settings”, where you have to specify an application title (which will be shown on the launchpad tile and in the title of the browser tab in which the application will run) and your application namespace (this will be your application-specific namespace in all your application files). The third field here called Description is not mandatory.
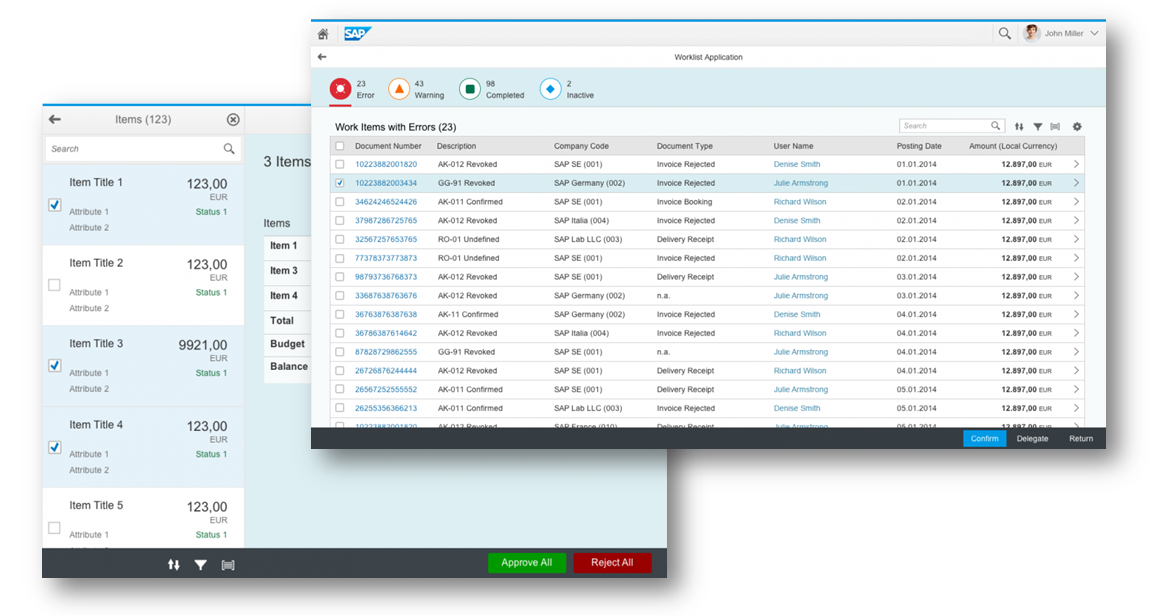
Finally, you have to specify the collection of your OData service you want to use for the binding on the views and the respective fields within this collection you want to be bound. To get more information on these, just click on the image to the right that will expand in a lightbox and reveal where your values will be bound. After hitting Next you just need to confirm all your settings then a new project will appear in your workspace within a few seconds.

Features Included in the Template Coding
 Now with this done, let`s see what we’ve got. To start the application we just created, you’ll find all standalone runnable files (*.html in the web world) in the /webapp/test folder. Here you’ll find a testFLPService.html file, which will run the app with a mock server when started. The other file, testFLP.html, will run the app with your real back-end service. This directory also includes the testsuite.qunit.html file mentioned previously. Run this in your CI environment and add your own tests here (and have a look at the tests shipped with the template based on QUnit and OPA5 in the directories below).
Once you start the app, you’ll realize that both apps run within a SAP Fiori launchpad sandbox development environment. Additional collaboration options that make use of this are already in place and hidden behind the button in the bottom right of the footer. Choose this button to share the app in the given state as a tile or send out a link by email.
If we look at the general UI of our templates, we only see a minimal footprint - just enough to select entities and navigate between them (hash-based navigation, by the way, which includes not-found and catch-all scenarios). Most of the magic happens in what’s hidden from view. From busy handling (have a look at the busy-concept SAP Fiori uses, it`s the one you’ll find here as well) and technical error handling (there is one file in the webapp/controller folder called ErrorHandler.js that handles all of this) up to models that handle texts (i18n resource models), states on the individual views (ever heard of mmvc) and of course the app data itself (ODataModel V2 is used here).
With all that in place, you’re now just about ready to implement your scenario-specific business logic on top of what SAP Web IDE has generated for you. And once you’ve created what you initially envisioned for your customer, you can let SAP Web IDE create a component-preload file for you (via clientside-build) that bundles all your application resources into one file. This will really speed up your application startup time. Read more about it in this post. What’s more, all the settings needed for this have already been made with the initial template generation coding.
Finally you might ask about the documentation of these templates. Valid point! And it`s there, you can read about all this in more detail in the SAPUI5 Demokit in this chapter.
[Added 11th Feb 2016]
As we see a growing number of templates in SAP Web IDE in the meantime it might make sense to also consult this more broader view on what`s in there for you besides these two. Check it out!
[Added 18th Feb 2016]
There is another post here on SCN that looks into the template features in more detail here.
- SAP Managed Tags:
- SAPUI5,
- SAP Enterprise Portal
10 Comments
You must be a registered user to add a comment. If you've already registered, sign in. Otherwise, register and sign in.
Labels in this area
-
ABAP CDS Views - CDC (Change Data Capture)
2 -
AI
1 -
Analyze Workload Data
1 -
BTP
1 -
Business and IT Integration
2 -
Business application stu
1 -
Business Technology Platform
1 -
Business Trends
1,658 -
Business Trends
91 -
CAP
1 -
cf
1 -
Cloud Foundry
1 -
Confluent
1 -
Customer COE Basics and Fundamentals
1 -
Customer COE Latest and Greatest
3 -
Customer Data Browser app
1 -
Data Analysis Tool
1 -
data migration
1 -
data transfer
1 -
Datasphere
2 -
Event Information
1,400 -
Event Information
66 -
Expert
1 -
Expert Insights
177 -
Expert Insights
293 -
General
1 -
Google cloud
1 -
Google Next'24
1 -
Kafka
1 -
Life at SAP
780 -
Life at SAP
12 -
Migrate your Data App
1 -
MTA
1 -
Network Performance Analysis
1 -
NodeJS
1 -
PDF
1 -
POC
1 -
Product Updates
4,577 -
Product Updates
340 -
Replication Flow
1 -
RisewithSAP
1 -
SAP BTP
1 -
SAP BTP Cloud Foundry
1 -
SAP Cloud ALM
1 -
SAP Cloud Application Programming Model
1 -
SAP Datasphere
2 -
SAP S4HANA Cloud
1 -
SAP S4HANA Migration Cockpit
1 -
Technology Updates
6,873 -
Technology Updates
417 -
Workload Fluctuations
1
Related Content
- Onboarding Users in SAP Quality Issue Resolution in Technology Blogs by SAP
- IoT - Ultimate Data Cyber Security - with Enterprise Blockchain and SAP BTP 🚀 in Technology Blogs by Members
- Accelerate Business Process Development with SAP Build Process Automation Pre-Built Content in Technology Blogs by SAP
- Configure Custom SAP IAS tenant with SAP BTP Kyma runtime environment in Technology Blogs by SAP
- Enabling Support for Existing CAP Projects in SAP Build Code in Technology Blogs by Members
Top kudoed authors
| User | Count |
|---|---|
| 32 | |
| 24 | |
| 8 | |
| 7 | |
| 7 | |
| 6 | |
| 6 | |
| 6 | |
| 5 | |
| 4 |