SAP BODS 4.2 has new transformation called “Data Mask” ,which is used to enables the data masking
functionality .
Eg: Protect personally identifications ids (like SSN, PAN, etc..) and information in your data. Personal information includes data such as credit card numbers,
sal information, dob, phone numbers, credit card numbers or bank account numbers. You may want to use data masking to support security and privacy
policies, and to protect your customer or employee information from possible missuses.
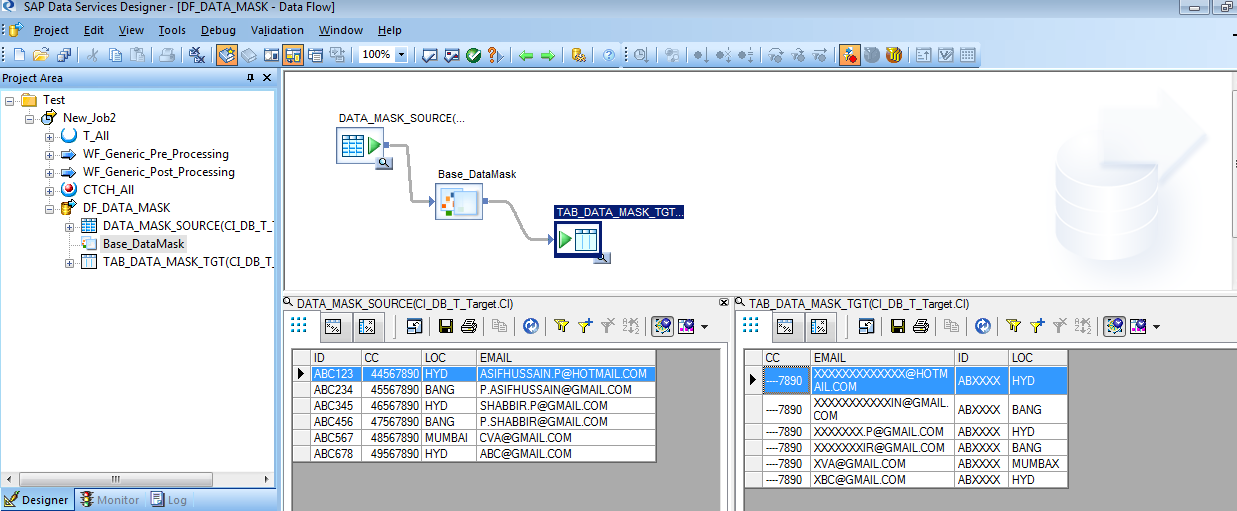
I have created a source table with data as looks below.

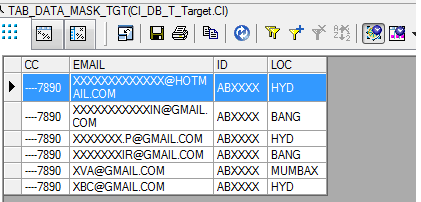
After masking the results would be
This will explain the steps to mask the personal information like ID,CC and EMAIL.
SAP BODS Data Mask Transformation:

Created a Data flow with source-->Data Mask-->Target mapping.

Data Mask Transformation Properties :
Data Mask transform has 3 tabs 1.Input 2.Option 3.Output tabs
Input tab properties: –In input tab map the respective source columns accordingly

E.g: Mapped input accordingly...
ID-->GENARLA_DATA1
CC-->NUMARIC_DATA1 (as CC has numeric values and datatype is int)
EMAIL-->EMAIL1
LOC-->GENARLA_DATA1
Options tab properties: option tab allows to specify the masking options for each column and create as many as “mask out “by right click
and create duplicate Option.

Column assignment and specify the masking characters like as follows below
- Map the input Field –EMAIL (Browse the column name where you want mask)
- Starting position –END/START (means how you want to mask from start or end
- UnmaskedLength—length (how many characters you want to mask)
- Masking Character –Which character you want to use for masking

Perform the same steps for all required columns.
Output properties : Check the requires columns in output tab

Results: