
- SAP Community
- Products and Technology
- Enterprise Resource Planning
- ERP Blogs by Members
- MASTER DATA UPLOAD PROGRAM FOR BEGINNERS
Enterprise Resource Planning Blogs by Members
Gain new perspectives and knowledge about enterprise resource planning in blog posts from community members. Share your own comments and ERP insights today!
Turn on suggestions
Auto-suggest helps you quickly narrow down your search results by suggesting possible matches as you type.
Showing results for
Bashir_Hussain
Active Participant
Options
- Subscribe to RSS Feed
- Mark as New
- Mark as Read
- Bookmark
- Subscribe
- Printer Friendly Page
- Report Inappropriate Content
04-02-2015
11:53 AM
I am writing this document for the assistance of all beginners who trying to upload master data files via LSMW upload program. I also believe there are some other documents available with same content on SCN forum, hope all experts appreciate this input from my side.
Document Benefits
- How to create LSMW upload program with single batch input recording
- How to create LSMW upload program with multiple recording while having same Project, Sub-project and Object
- How to use same LSMW program on different Clients or Systems Landscape (DEV -> QAS -> PRD)
Legacy System Migration Workbench (LSMW)
SAP provides you with the Legacy System Migration Workbench (LSMW), a tool that supports the one-time or periodic transfer of data from a variety of sources without any programming. You define the mapping and the rules for the changeover and the LSMW then uses this definition to generate an ABAP data transfer program. This gives you considerable support during the migration.
For more: http://scn.sap.com/docs/DOC-26158?url_id=text-search-best-best-scn-doc-26158
In this tutorial, I shall show you how to create LSMW upload program by having same project, sub-project and object and how to reuse your already created LSMW program to other clients or systems.
Note:
For attached screenshot, I am working on IDES System with EHP6 and using NWBC Desktop 5.0 so your screens may differ from attached one.
LSMW Upload steps are:
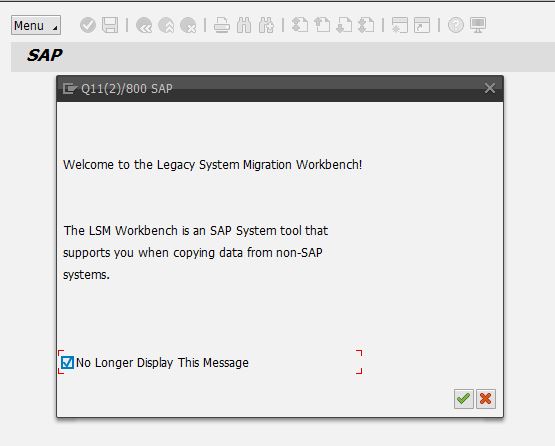
1) Access Transaction Code = LSMW
After pressing enter you will reached on below windows popup message click on green tick mark button to move forward:
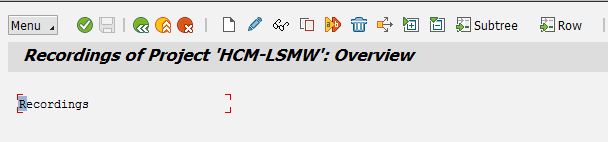
2) You will reached on below screen

3) Enter details of Project, Sub-project and Object as per your requirements/domain here I am putting example of Human Capital Management – HCM domain.
Project:
You can specifies the name of the data transfer project, Enter any abbreviation with a maximum of ten characters and no blank characters. You can assign more than one sub-project to a project. As I am entering name of my project HCM-LSMW
Sub-project:
You can specifies the name of the sub-project, Enter any abbreviation with a maximum of ten characters and no blank characters. A sub-project can have an unlimited number of objects. As I am entering name of my sub-project HCM-PA
Object:
Object name. An object corresponds to a business object. It might be a HR master, client master, material master, financial documents. An object is assign to a sub-project; you can specifies the name of the object, Enter any abbreviation with a maximum of ten characters and no blank characters. As I am entering name of my object Infotype IT0006

4) After entering short text of Project, Sub-project and its object click on create button and enters detail description against Project, Sub-project, Object one by one as per your requirement and understanding. How to proceeds ahead have a look on below screens shots:


5) After entering all details, you will reach back on below window, and then you click on Clock icon button to execute your LSMW project, sub-project and its object.

6) After executing your project you will reached on below window, where you find Process step from 1 – 20, kindly note after completing first step successfully, these reduced from 1 – 14 so no need to worry,

Kindly note after completing first step successfully, these reduced from 1 – 14 as shown below screen, so no need to worry
7) Select process step 1 and press execute button to proceeds ahead:
😎 You will reach on below screen and find tabs as:
a. Attributes:
Here you select once only option
b. Object Type and Import Method
Select Batch input recording radio option

Click on overview button in front of batch input recording option that leads you below mention screen
Keep cursor on recording section and then click on create button then you will find below screen

Provide Recording name, recording description as per your requirement and understanding then click on green tick button that leads you towards below screen:

Enter your required transaction code as here I put PA30 for Employee Master Data maintenance data in down screen

Enter all necessary data that you want to include during your recording like here:
- Employee #: 41546
- Info type #: 0006
- Sub type#: 3
- Period: 24.11.2014 – 31.12.9999
Then press create button to proceeds ahead your recording I am recording here only mandatory fields
- Postal Code #: 30301
- City #: Riyadh

Entries fills down:

For other recording, you also follow the same steps:

For other recording, you also follow the same steps:

Add information as per your requirement for rest of recording as I am doing below for IT0105 communication against email subtype: 0010 E- mail

Choose subtype 0010 – Email

Save data by pressing save button then you find below screen

Click on “Default All” and press save button and then click back button to reach on below window
Before proceeding towards step 2, click on Object Overview button, then you reached on below screen
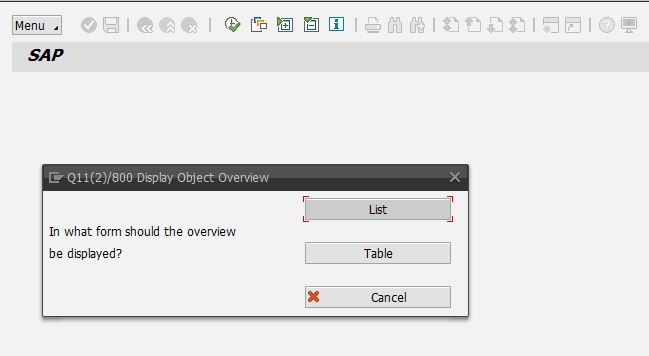
Click on Table button to find below window:

This step is very important and help you to create source fields mapping and master data template files
- Source Fields:
Source fields are those fields, which have already recorded, in your previous step of recording so in step you simply copy not all fields starting from Personnel Number (PERNR) kindly include Transaction code and Table name field that not required:
Note: copy these fields with help of Ctrl + Y, then make selection, paste these fields on any Microsoft Excel sheet, cut Field Description column, and put it on end as show in below:

- Master data Template file:
For your easy, to create your master data template or Upload file template copy all fields from above table and paste them from column to rows shape as show below:

Like this your master data template get ready easily and well mapped with recording
Proceed for step 2, select it and execute it

Select step number 2 and click execute button, where you just save entries and came back. You will reached below window screen

Select step # 3, and maintain source fields by clicking on Table maintenance button as below:

Click save button and back button and you will reached on below button:

Proceeds for step # 5, maintain field mapping where I suggest choose auto mapping from menu toll bar

Go to menu, choose extra, and then choose auto mapping

Go to menu, choose extra, and then choose auto mapping as shown below:


- SAP Managed Tags:
- HCM (Human Capital Management)
8 Comments
You must be a registered user to add a comment. If you've already registered, sign in. Otherwise, register and sign in.
Labels in this area
-
"mm02"
1 -
A_PurchaseOrderItem additional fields
1 -
ABAP
1 -
ABAP Extensibility
1 -
ACCOSTRATE
1 -
ACDOCP
1 -
Adding your country in SPRO - Project Administration
1 -
Advance Return Management
1 -
AI and RPA in SAP Upgrades
1 -
Approval Workflows
1 -
ARM
1 -
ASN
1 -
Asset Management
1 -
Associations in CDS Views
1 -
auditlog
1 -
Authorization
1 -
Availability date
1 -
Azure Center for SAP Solutions
1 -
AzureSentinel
2 -
Bank
1 -
BAPI_SALESORDER_CREATEFROMDAT2
1 -
BRF+
1 -
BRFPLUS
1 -
Bundled Cloud Services
1 -
business participation
1 -
Business Processes
1 -
CAPM
1 -
Carbon
1 -
Cental Finance
1 -
CFIN
1 -
CFIN Document Splitting
1 -
Cloud ALM
1 -
Cloud Integration
1 -
condition contract management
1 -
Connection - The default connection string cannot be used.
1 -
Custom Table Creation
1 -
Customer Screen in Production Order
1 -
Data Quality Management
1 -
Date required
1 -
Decisions
1 -
desafios4hana
1 -
Developing with SAP Integration Suite
1 -
Direct Outbound Delivery
1 -
DMOVE2S4
1 -
EAM
1 -
EDI
2 -
EDI 850
1 -
EDI 856
1 -
edocument
1 -
EHS Product Structure
1 -
Emergency Access Management
1 -
Energy
1 -
EPC
1 -
Financial Operations
1 -
Find
1 -
FINSSKF
1 -
Fiori
1 -
Flexible Workflow
1 -
Gas
1 -
Gen AI enabled SAP Upgrades
1 -
General
1 -
generate_xlsx_file
1 -
Getting Started
1 -
HomogeneousDMO
1 -
IDOC
2 -
Integration
1 -
Learning Content
2 -
LogicApps
2 -
low touchproject
1 -
Maintenance
1 -
management
1 -
Material creation
1 -
Material Management
1 -
MD04
1 -
MD61
1 -
methodology
1 -
Microsoft
2 -
MicrosoftSentinel
2 -
Migration
1 -
MRP
1 -
MS Teams
2 -
MT940
1 -
Newcomer
1 -
Notifications
1 -
Oil
1 -
open connectors
1 -
Order Change Log
1 -
ORDERS
2 -
OSS Note 390635
1 -
outbound delivery
1 -
outsourcing
1 -
PCE
1 -
Permit to Work
1 -
PIR Consumption Mode
1 -
PIR's
1 -
PIRs
1 -
PIRs Consumption
1 -
PIRs Reduction
1 -
Plan Independent Requirement
1 -
Premium Plus
1 -
pricing
1 -
Primavera P6
1 -
Process Excellence
1 -
Process Management
1 -
Process Order Change Log
1 -
Process purchase requisitions
1 -
Product Information
1 -
Production Order Change Log
1 -
Purchase requisition
1 -
Purchasing Lead Time
1 -
Redwood for SAP Job execution Setup
1 -
RISE with SAP
1 -
RisewithSAP
1 -
Rizing
1 -
S4 Cost Center Planning
1 -
S4 HANA
1 -
S4HANA
3 -
Sales and Distribution
1 -
Sales Commission
1 -
sales order
1 -
SAP
2 -
SAP Best Practices
1 -
SAP Build
1 -
SAP Build apps
1 -
SAP Cloud ALM
1 -
SAP Data Quality Management
1 -
SAP Maintenance resource scheduling
2 -
SAP Note 390635
1 -
SAP S4HANA
2 -
SAP S4HANA Cloud private edition
1 -
SAP Upgrade Automation
1 -
SAP WCM
1 -
SAP Work Clearance Management
1 -
Schedule Agreement
1 -
SDM
1 -
security
2 -
Settlement Management
1 -
soar
2 -
SSIS
1 -
SU01
1 -
SUM2.0SP17
1 -
SUMDMO
1 -
Teams
2 -
User Administration
1 -
User Participation
1 -
Utilities
1 -
va01
1 -
vendor
1 -
vl01n
1 -
vl02n
1 -
WCM
1 -
X12 850
1 -
xlsx_file_abap
1 -
YTD|MTD|QTD in CDs views using Date Function
1
- « Previous
- Next »
Related Content
- We Need a help to check the punchout catalogues configuration in our S4 system in Enterprise Resource Planning Q&A
- Bank balance upload for G/L Account is not supported. in Enterprise Resource Planning Q&A
- S4 HANA Cost Center Activity Rate Calculation Hybrid Approach in Enterprise Resource Planning Blogs by Members
- How to check ACDOCA and ACDOCU tables for S4H system in Enterprise Resource Planning Q&A
- SAP S/4HANA Cloud Private Edition | 2023 FPS01 Release – Part 2 in Enterprise Resource Planning Blogs by SAP
Top kudoed authors
| User | Count |
|---|---|
| 6 | |
| 2 | |
| 2 | |
| 2 | |
| 2 | |
| 2 | |
| 1 | |
| 1 | |
| 1 |