Learn how to extend and personalize SAP applications. Follow the SAP technology blog for insights into SAP BTP, ABAP, SAP Analytics Cloud, SAP HANA, and more.
In this blog we will understand how to set up the Mobi Android SDK project with Android studio. We will also understand the changes to be made to create new product flavors of the SDK project which in simple words mean we create an application which can be installed along side the Mobi application published by SAP on google Play store.
The blog is divided into four major parts:
*Installation of Android Studio
*Configuring the SDK project in Android Studio
*Modifying the project to enable “Side by Side” installation along with Mobi application present on Android Play Store( Supported from Mobi Android SDK version 6.1.7)
*Signing the release build
Installation of Android Studio
Android Studio is now the official Android IDE. For “side by side” installation of the play store app and the SDK app the gradle build system present in Android studio is required. Eclipse does not support this feature.
Start installation by double clicking the downloaded Android studio Installer. Click on ‘Yes’ if you are prompted with a security warning
Click on Next to Continue the installation
Select all the components for installation
Select the location for all the components to be installed. ( Default recommended)
Click on “Next” and “Install” in the subsequent Windows to proceed with the installation!
Now select the “SDK Manager” option from the tool bar to install the following Components
Once the Installation is done Close SDK Manager and also Android Studio!
Configuring the SDK project in Android Studio
Download the zip file SAPBusinessObjectsMobileAndroidLib-X.X.X.zip
Extract it to the folder SAPBusinessObjectsMobileAndroidLib-X.X.X
(Note: The zip file name may vary from the actual file which you download from SMP and hence the name of the extracted folder name will also not be the same. The name used here serves as a placeholder)
Run android studio and you should be greeted with a welcome menu as given below. Select the Open an existing Android Studio project option as highlighted.
Go to the location where the unzipped folder exists and select the root level folder as shown below and Choose OK
In the next screen, choose OK as highlighted
In the next screen,choose Don't remind me again for this project as highlighted
Now select File->Settings->Instant Run(under Build, Execution, Deployment), uncheck the highlighted item and choose OK
The project is all set! You can run the application by clicking on the button in the tool Bar
Modifying the project to enable “Side by Side” installation along with Mobi application present on Android Play Store
Open the build.gradle file under app (as done before) Add the following lines and then click on “Sync now” like before.
productFlavors{
<Your-Flavor-Name>{
applicationId <Unique-Application-id>
}
}
Example-
productFlavors{
sdk{
applicationId "com.sdk.mobi"
}
}
(Note- Please make sure your applicationId is not com.sap.mobi )
Now open the AndroidManifest.xml (Under Android->app->manifests)
Change the android authority attribute under both the provider tags! This value should be the same as the applicationId given in the previous step.
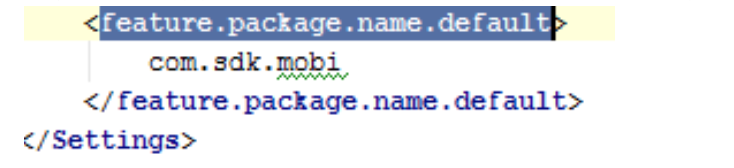
Open the file defaultSettings.xml and change the value under the feature.package.name.default tag to the applicationId given in the previous steps.
Now select Build->Rebuild Project.
The project is all set! You can run the application by clicking on the button in the tool Bar.
Creating Multiple Applications
You can create more than one application by having multiple product flavors. You can select different build variants from build variants tab.
An important step after this is to make sure you change the values in AndroidManifest.xml and defaultSettings.xml with the application id of the variant chosen currently. ( As shown in the previous section)
'
Signing the release build
Select the ‘release’ build variant under the build variants tab and then Sign your application!


 '
'
