
- SAP Community
- Products and Technology
- Technology
- Technology Blogs by Members
- C4C Application Enhancements: Building a Change Lo...
Technology Blogs by Members
Explore a vibrant mix of technical expertise, industry insights, and tech buzz in member blogs covering SAP products, technology, and events. Get in the mix!
Turn on suggestions
Auto-suggest helps you quickly narrow down your search results by suggesting possible matches as you type.
Showing results for
Former Member
Options
- Subscribe to RSS Feed
- Mark as New
- Mark as Read
- Bookmark
- Subscribe
- Printer Friendly Page
- Report Inappropriate Content
12-04-2014
9:25 AM
Note of the 31st July 2015:
the following solution has been thought and realized for the Release 1411 and carried on until Release 1505.
SAP Cloud for Customer Release 1508 delivered a Standard Solution for the Business Partner Change Log, available by simply enabling the CHANGES tab in your user/role layout and playing with it, as shown in the picture below:

From a personal point of view, the article content has been anyway an interesting and challenging achievement that let us figure out anyway how to deliver a complex enhancement on the standard C4C solution. Consequently, the lessons learnt have been helpful for few of other Client's requirements we are achieving by enhancements.
Thank you all for having appreciated the content of the article during the last months.
All the best wishes,
Davide
SAP Cloud for Customer is the new Customer-Centric Enterprise Cloud solution designed and released by SAP for the Customer Engagement and Relationship Management. This new solution enables you to align the business organizations and units around the Customer, with Marketing, Sales and Customer Service functionalities at the front line to the Customer.
In the new SDK Framework provided with SAP C4C (called SAP Cloud Application Studio) the main advantage is the model of Designing and Programming based on Business Objects. Every business entity, such as Master Data entities, can be seen as an instance of a specific class: the Business Object, with inside all the contained data and fields seen as a member properties, and with all the actions seen as class methods. The picture below shows the architecture of the BusinessPartnerBusiness Object:

As you can see, all the properties defined in the BusinessPartner BO definition map the fields and the tables which are present in the Customer Account WorkCenter View, where Users can check and change any information on their managed Customers and Prospects, as shown in the picture below:

The advantage of this programming model is that the designer is not just free to use the given actions programmatically in the code, but even to define and extend the BO with new fields, new referenced child BO and new actions.
In this article we focus on an Implementation and Realization of an Extension on the Account functionality. Consider for instance the case that a User in the Company’s Sales Department needs to keep track of the full maintenance and management of the information stored for the Customers in his portfolio. Sometimes, in our past CRM Project experiences, our User asked if was possible to track the changes done in the system for some relevant information such as the Company name, the address and the contact phone. In a way to track the changed field, the value, the time of the change and even the User who did the change on the system.
Using the SAP CRM system, this result would have been achieved by enabling the Change History Assignment Block on the Account UI Page for the required User(s). Nevertheless, in SAP Cloud for Customer Rel. 1411 a functionality similar to the Change Log is still missing in the Account WorkCenter, and in order to achieve a similar User requirement we should define a custom enhancement that keeps tracks of the changes on relevant Account information.
In order to define our scope and purposes, we can summarize the desired requirements in the following numbered list:
RQ01. Supervisors MUST have the ability to flag a BP record as "Monitored Customer" and add a "Review Date” and then capture changes in the change log if the flag is set;
RQ02. The fields created in RQ01 need to only be available to a user of a specific business role (Supervisor);
RQ03. The tracked changes must be displayed in a Change log, strictly available just for a few set of roles.
The following sections will explain the solution developed in order to achieve that result.
Solution
The solution has been realized using the SAP Cloud Application Studio. The core of the solution is based on an enhancement on the BusinessPartner Business Object, made by adding a custom behaviour on the BeforeSave Event. In details, the list of the enhancements on the core logic is the following:
· Define a new Business Object, which will collect all the changes done on each relevant field (such as the Name, the Address, the Phone and the Email) with the old value, the new value, the user who did the change and the time it has been done;
· Enhance the BusinessPartner Business Object by adding a new checkbox field (called “Monitored Customer”);
· Enhance the BusinessPartner Business Object by adding a new BeforeSave Event Handler with the following logic: if the Monitored Customer flag has been checked, then create a new entry for the Change Log;
· Create a new UI screen that will collect all the Change Log entries, making them available for part of the Business Roles defined in the Cloud for Customer implementation.
The sections below will illustrate each of the components in details.
Business Object definition
The data modelling which will provide the Change Log functionality could be easily designed and built by defining a new Business Object (AccountChangeLogEntry), which will represent one of the log entries. The BO code is shown below:
import AP.Common.GDT as apCommonGDT;
import AP.FO.BusinessPartner.Global;
importAP.PC.IdentityManagement.Global;
[DeploymentUnit(Foundation)] businessobject AccountChangeLogEntry {
[Label ("Change Log Entry ID")] element ChangeLogEntryID:ID;
[Label ("Change Type")] element ChangeType:ChangeTypeCode;
[Label ("Field Name")] element FieldName:LANGUAGEINDEPENDENT_MEDIUM_Name;
[Label ("Old Value")] element OldValue:LANGUAGEINDEPENDENT_EXTENDED_Text;
[Label ("New Value")] element NewValue:LANGUAGEINDEPENDENT_EXTENDED_Text;
[Label ("Changed At")] element ChangedAt:Time;
[Label ("Changed On")] element ChangedOn:Date;
[Label ("Timestamp")] elementChangedAtTimestamp:GLOBAL_DateTime;
[Label ("Active")] elementActive:Indicator;
[Label ("Account ID")] element AccountID:BusinessPartnerID;
associationRefBusinessPartner to BusinessPartner;
[Label ("Identity UUID")] element IdentityUUID:UUID;
associationRefUser to Identity;
}
Important: if you want that the created Business Object will interact with the Business Partner BO, it is required that they both share the same Deployment Unit. Otherwise the BO content will be read-only for the Business Partner, and no new entries could be created!
Furthermore, in order to use the BO and look up the BO data in another block of code, it is necessary to define a custom Query on the AccountChangeLogEntry BO. The Query could be created by using the Create Query functionality in the BO Contextual Menu:

And will be defined by the following parameterization:

Business Partner BO extensions
The code for the BusinessPartner BO Extensions is displayed below:
import AP.Common.GDT;
import AP.FO.BusinessPartner.Global;
[Extension] businessobjectAP.FO.BusinessPartner.Global:BusinessPartner {
node Common {
[Label ("Name Validation Flag")] element flgNameValidation:Indicator;
[Label ("Monitored Customer")] element flgMonitoredCustomer:Indicator;
[Label ("Review Date")] elementreviewDate:Date;
}
}
In order to change the value for these fields, they has been put on the Header pane in the UI component COD_Account_TI, as shown below:

The effect on the account screen is shown in the picture below:

BeforeSave Event Handler Logic
The BeforeSave logic has been developed in a way that the initial value of a field is tracked with a new AccountChangeLogEntry BO, if the flag "Monitored Customer" has been enabled. Then, every time the BeforeSave Event Handler is called, the current value is compared with the latest value in the AccountLChangeLogEntry BOs list. If it is different, a new value is stored.
Important: if you are interested to track the value for the fields belonging to the BusinessPartner Common node, then you should put the following logic in the Common node Event-BeforeSave.absl script. Otherwise the code won’t ever be triggered!
The full implementation code (with comments for all the steps done) has been displayed below:
import ABSL;
import AP.Common.GDT;
// we start setting up all the required variables:
var bp = this.ToRoot.InternalID;
var oldLogEntry:BusinessObject::AccountChangeLogEntry;
var logEntry:BusinessObject::AccountChangeLogEntry;
var oldValue:LANGUAGEINDEPENDENT_EXTENDED_Text;
var newValue:LANGUAGEINDEPENDENT_EXTENDED_Text;
var typeCode:ChangeTypeCode;
var fieldName= "";
// The logic has been restricted for those Accounts who have the flag "Monitored Customer" enabled:
if (this.flgMonitoredCustomer == true) {
// we extract the list of field to monitor from the BCO MONITORED_FIELDS:
var fieldList= MONITORED_FIELDS.QueryByElements.Execute();
var count = MONITORED_FIELDS.QueryByElements.Count();
foreach (varfield in fieldList) {
fieldName = field.FIELD_NAME;
// For each of them, the new value should be found in a particular position in the Business Object structure:
switch (fieldName) {
case (FieldListCode.CO_ORG_NAME) {
newValue= this.Organisation.Name.FirstLineName+ " " + this.Organisation.Name.SecondLineName;
typeCode= ChangeTypeCode.CO_NAME;
}
case (FieldListCode.CO_GIVEN_NAME) {
newValue= this.Person.Name.GivenName;
typeCode= ChangeTypeCode.CO_NAME;
}
case (FieldListCode.CO_FAMILY_NAME) {
newValue= this.Person.Name.FamilyName;
typeCode= ChangeTypeCode.CO_NAME;
}
}
// at first we query the existing ChangeLog entries for that BP and field:
var query = AccountChangeLogEntry.QueryLastEntry.QueryByElements;
var resultData= query.ExecuteDataOnly();
var selectionParams= query.CreateSelectionParams();
selectionParams.Add(query.RefBusinessPartner_InternalID, "I", "EQ", bp);
selectionParams.Add(query.FieldName, "I", "EQ", fieldName);
resultData = query.ExecuteDataOnly(selectionParams);
// The processing of which line add to the table will depend on which are the existing results:
if (resultData.Count() == 0) {
// In this case, this is the first monitored entry for the BP/Field.
// The old value has been thus set to empty:
if (!newValue.IsInitial()) {
logEntry= AccountChangeLogEntry.Create(
ChangeLogReuseLibrary.CreateNewEntry(typeCode, fieldName, "", newValue, bp, true));
logEntry.RefBusinessPartner = this.ToRoot;
}
} else {
//In this case, we get the old value by the most recent entry in the table:
resultData.OrderByDescending(n=>n.ChangedAtTimestamp);
oldValue= resultData.GetLast().NewValue;
if (oldValue != newValue) {
//just in case that the extracted vaue is different than the current value, then add a new line:
logEntry = AccountChangeLogEntry.Create(
ChangeLogReuseLibrary.CreateNewEntry(typeCode, fieldName, oldValue, newValue, bp, true));
logEntry.RefBusinessPartner = this.ToRoot;
}
}
}
}
After encapsulating the core logic in an external Reuse Library (see the section below) the Event Handler logic has been converted in a simpler implementation, which is displayed below:
· For the Common node BeforeSave Event Handler:
import ABSL;
ChangeLogReuseLibrary.ChangeLogController(this.ToRoot.InternalID, ChangeTypeCode.CO_NAME);
· For the AddressInformation node BeforeSave Event Handler:
import ABSL;
ChangeLogReuseLibrary.ChangeLogController(this.ToRoot.InternalID, ChangeTypeCode.CO_ADDRESS);
· For the Identification node BeforeSave Event Handler:
import ABSL;
ChangeLogReuseLibrary.ChangeLogController(this.ToRoot.InternalID, ChangeTypeCode.CO_ID);
ChangeLog Reuse Library
Some common procedures:
· The creation of a new Change Log Entry;
· The generation of a new number (given a number range);
· The core logic of looking-up the old field value, comparing with the new value and adding a new Entry in the Change Log
have been encapsulated in a Reuse Library called ChangeLogReuseLibrary. The listings below will show you the code implemented for each of them.
Create New Entry Function

import ABSL;
import AP.FO.BusinessPartner.Global;
var result: elementsof AccountChangeLogEntry;
result.ChangedAt= Context.GetCurrentSystemTime();
result.ChangedOn= Context.GetCurrentSystemDate();
result.ChangedAtTimestamp= Context.GetCurrentGlobalDateTime();
result.ChangeLogEntryID= ChangeLogReuseLibrary.GetNumber(AccountChangeLogEntryNumberRan.CO_LOG_ITEM);
result.ChangeType= ChangeType;
result.FieldName= FieldName;
result.OldValue= OldValue;
result.NewValue= NewValue;
result.Active= Active;
result.AccountID= RefBusinessPartner;
result.IdentityUUID= Context.GetCurrentIdentityUUID();
return result;
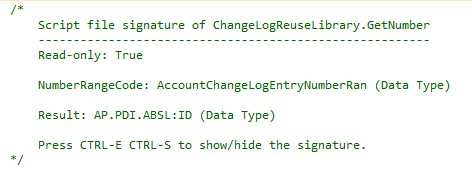
Get a new ID Number (by Number Range)
import ABSL;
var result : DataType::ID;
var number = NumberRange.DrawNumber(NumberRangeCode);
switch (NumberRangeCode) {
case (AccountChangeLogEntryNumberRan.CO_LOG_ITEM) { number= number + 1000000000; }
case (AccountChangeLogEntryNumberRan.CO_OTHER) { number= number + 2000000000; }
}
result = number.ToString();
var stop_the_damn_debugger_here= true;
return result;
Change Log Controller and Comparing tool

import ABSL;
import AP.Common.GDT;
import AP.FO.BusinessPartner.Global;
import AP.PC.IdentityManagement.Global;
// we start setting up all the required variables:
var bp = Parameter::BusinessPartnerID;
var bp2:BusinessPartnerID;
var em2:IdentityID;
var refBP:BusinessObject::BusinessPartner= BusinessPartner.Retrieve(bp);
var oldLogEntry:BusinessObject::AccountChangeLogEntry;
var logEntry:BusinessObject::AccountChangeLogEntry;
var oldValue:LANGUAGEINDEPENDENT_EXTENDED_Text;
var newValue:LANGUAGEINDEPENDENT_EXTENDED_Text;
var typeCode:ChangeTypeCode;
var fieldName= "";
// The logic has been restricted for those Accounts who have the flag
// "Monitored Customer" enabled:
if (refBP.Common.GetFirst().flgMonitoredCustomer == true) {
var availableFieldsByTypeQuery= CHANGETYPE_FIELD_ASSOCIATION.QueryByElements;
var afbtqParams= availableFieldsByTypeQuery.CreateSelectionParams();
afbtqParams.Add(availableFieldsByTypeQuery.CHTYPE, "I", "EQ", ChangeTypeNode);
var avFieldList= availableFieldsByTypeQuery.Execute(afbtqParams);
var aCount = avFieldList.Count();
// we extract the list of field to monitor from the BCO MONITORED_FIELDS:
var fieldListQuery= MONITORED_FIELDS.QueryByElements;
var flParam = fieldListQuery.CreateSelectionParams();
if (aCount != 0) {
foreach (var record in avFieldList) {
flParam.Add(fieldListQuery.FIELD_NAME, "I", "EQ", record.FIELD);
}
}
var fieldList= fieldListQuery.Execute(flParam);
var count = fieldList.Count();
foreach (varfield in fieldList) {
fieldName = field.FIELD_NAME;
// For each of them, the new value should be found in a particular position
// in the Business Object structure:
switch (fieldName) {
case (FieldListCode.CO_ORG_NAME) {
newValue = refBP.Common.GetFirst().Organisation.Name.FirstLineName
+ " "
+ refBP.Common.GetFirst().Organisation.Name.SecondLineName;
}
case (FieldListCode.CO_GIVEN_NAME) {
newValue= refBP.Common.GetFirst().Person.Name.GivenName;
}
case (FieldListCode.CO_FAMILY_NAME) {
newValue= refBP.Common.GetFirst().Person.Name.FamilyName;
}
case (FieldListCode.CO_PHONE) {
newValue= refBP.CurrentDefaultAddressInformation.Address.DefaultConventionalPhone.FormattedNumberDescription;
}
}
// at first we query the existing ChangeLog entries for that BP and field:
var query = AccountChangeLogEntry.QueryLastEntry.QueryByElements;
var resultData= query.ExecuteDataOnly();
var selectionParams= query.CreateSelectionParams();
selectionParams.Add(query.RefBusinessPartner_InternalID, "I", "EQ", bp);
selectionParams.Add(query.FieldName, "I", "EQ", fieldName);
resultData = query.ExecuteDataOnly(selectionParams);
// The processing of which line add to the table will depend on which are the existing
// results:
if (resultData.Count() == 0) {
// In this case, this is the first monitored entry for the BP/Field.
// The old value has been thus set to empty:
if (!newValue.IsInitial()) {
logEntry= AccountChangeLogEntry.Create(
ChangeLogReuseLibrary.CreateNewEntry(
ChangeTypeNode, fieldName, "", newValue, bp, true));
logEntry.RefBusinessPartner= refBP;
logEntry.RefUser= Identity.Retrieve(logEntry.IdentityUUID);
//logEntry.RefBusinessPartner = BusinessPartner.Retrieve(bp);
bp2= logEntry.RefBusinessPartner.InternalID;
em2= logEntry.RefUser.ID;
}
} else {
//In this case, we get the old value by the most recent entry in the table:
resultData.OrderByDescending(n=>n.ChangedAtTimestamp);
oldValue= resultData.GetLast().NewValue;
if (oldValue != newValue) {
//just in case that the extracted vaue is different than the current value,
//then add a new line:
logEntry= AccountChangeLogEntry.Create(
ChangeLogReuseLibrary.CreateNewEntry(
ChangeTypeNode, fieldName, oldValue, newValue, bp, true));
logEntry.RefBusinessPartner= refBP;
logEntry.RefUser= Identity.Retrieve(logEntry.IdentityUUID);
//logEntry.RefBusinessPartner = BusinessPartner.Retrieve(bp);
bp2= logEntry.RefBusinessPartner.InternalID;
em2= logEntry.RefUser.ID;
}
}
}
}
Address management
In the SAP C4C Data Model, the Address is a different Business Object than the Business Partner, and the AddressInformation node for the Business Partner BO stores just the association between an Address (stored in its Master Data) and the Business Partner.
This means that in case the user updates the association stored in the AddressInformation node (ex: by adding a new Address or removing an existing one for the Account), then the AddressInformation node BeforeSave Event will be fired. In the case instead the user updates the data within an existing Address (ex: by replacing the Phone Number) the AddressInformation node BeforeSave Event won’t be fired.
We then defined a better way to handle eventual changes to the Address data by implementing an extension to the AddressSnapshot BO (defined in the namespace: AP.FO.Address.Global), on the nodes with relevant information fields:
· Telephone;
· FormattedAddress;
· PostalAddress;
· Email.
A custom BeforeSave Event Handler implementation has been provided for each of them. In addition, a custom association between the Address UUID and the Business Partner ID has been defined in the Cloud Data Model by defining a new custom Business Object, called BusinessPartner_Address_Check. The custom BO definition is displayed here below:
import AP.Common.GDT as apCommonGDT;
import AP.FO.BusinessPartner.Global;
[DeploymentUnit(Foundation)] businessobject BusinessPartner_Address_Check {
elementBusinessPartnerID:BusinessPartnerID;
elementAddressUUID:ID;
}
The logic has been defined as it follows:
1. As soon that the Monitored Customer flag is set, the Common node BeforeSave Event Handler stores the association between the BP and the Address UUID in a new BusinessPartner_Address_Checkentry (if no previous entry existed);
2. At the time the Address data (telephone number or street, for instance) have been changed within the same address, the BeforeSave event for the AddressSnapshot BO is fired. A custom Event Handler will:
a. Check if the Address has been monitored (by executing a query the existing BusinessPartner_Address_Check BOs);
b. In the case it has been, read the Business Partner data, check its Monitored Customer flag, and call the ChangeLogController Change Library function.
The following sections will show the changes to the code in order to provide the desired implementation.
BusinessPartner-Common BeforeSave Event Handler
The code for the Common node BeforeSave Event Handler implementation has been then changed to the following listing:
import ABSL;
// RQ01-RQ02: Call to the Core Logic: ADDRESS:
// The following logic will the address UUID against the Monitored BP,
// in a custom Business Object.
if (this.flgMonitoredCustomer == true) {
var bpac:BusinessObject::BusinessPartner_Address_Check;
var addressUUID = this.ToRoot.AddressSnapshot.UUID;
var bp = this.ToRoot.InternalID;
// at first the code checks that the address-bp relation has been registered
// into the BO data:
var query = BusinessPartner_Address_Check.QueryByElements;
var params = query.CreateSelectionParams();
params.Add(query.AddressUUID, "I", "EQ", addressUUID.content.ToString());
params.Add(query.BusinessPartnerID, "I", "EQ", bp);
var results = query.Execute(params);
var count = results.Count();
// the new record is submitted into the cloud only if no data is already there:
if (count == 0) {
bpac= BusinessPartner_Address_Check.Create();
bpac.AddressUUID = addressUUID.content.ToString();
bpac.BusinessPartnerID = bp;
}
}
// RQ01-RQ02: Call to the Core Logic: NAME:
ChangeLogReuseLibrary.ChangeLogController(this.ToRoot.InternalID, ChangeTypeCode.CO_NAME);
AddressSnapshot BeforeSave Event Handler
The following code has been implemented for the BeforeSave EventHandler for the following nodes:
· Telephone;
· FormattedAddress;
· PostalAddress;
· Email.
import ABSL;
import AP.Common.GDT;
import AP.FO.BusinessPartner.Global;
var bpac:BusinessObject::BusinessPartner_Address_Check;
var addressUUID= this.ToParent.UUID;
var bp:BusinessPartnerID;
// for each address, the code checks the related bp in the Adress-BP Business Object data:
var query = BusinessPartner_Address_Check.QueryByElements;
var params = query.CreateSelectionParams();
params.Add(query.AddressUUID, "I", "EQ", addressUUID.content.ToString());
var results = query.Execute(params);
var count = results.Count();
// address could potentially have been shared among contacts.
// then update the log for everyone:
foreach (varrecord in results) {
if (!record.BusinessPartnerID.IsInitial())
ChangeLogReuseLibrary.ChangeLogController(
record.BusinessPartnerID,
ChangeTypeCode.CO_ADDRESS);
}
User Interface additional tools
This section will deal with some additional tools we can realize on the Cloud for Customer User Interface, in order to let it be suitable for Administrators and Customer Managers.
In the solution we realized the following UI tools:
· A global ACCOUNT CHANGE LOG UI WorkCenter, that will show all the tracked changes for all the Account defined in the system (with a query to the Business Object AccountChangeLogEntry);
· A local CHANGE LOG, that will show all the tracked changes for the single Account, and which has been attached as a new Tab to the Account/Customer WorkCenter.
The following sections will describe the single UI Tools.
Global ACCOUNT CHANGE LOG WorkCenter
For the Account Change Log WorkCenter, the following steps have been followed:
1. Select Create Screens from the Business Object Contextual menu, as shown below:

2. Select the options below, specifying a Short ID:

The environment will automatically define the following UI Screens:

3. In particular, we chose the Object Work List item (the AccountChangeLog_OWL.OWL.uicomponent screen), because it was the one that could better resemble the Log Layout, and defined the following additional functionalities inside:
· Refresh button: done by Firing an Event Handler that execute again the Default Set for the Default Query, as shown below:

· Delete button: done by adding LayoutStackPanel item on every line, which content is a Delete button:

The button will fire the Event Handler defined below:

· Thing-Type Navigation to the Account: define the InternalID field proprieties as shown below:

And then, on the Data Model tab select the UUID field. The DataField proprieties should be set up as shown below:

4. After these changes, activate and save the screen. After allowing your user to the New WorkCenter Frame, you will be able to see the new ACCOUNT CHANGE LOG functionality.
Embed the Change Log as a Tab on Customer Workcenter
In order to show the data at the Account TI screen level (as a new tab) the following activities have been done:
1. Add a new Embedded Component (EC) to the Solution, and filling it with a table made by the fields provided by the QueryByBP query:

2. Define a new Inport for getting the Account ID from the main application:

3. Define a new UI Query that runs the QueryByBP and put the result in the DataList Data Model node:

4. Define a new Event Handler (and put on the OnFire properties of the Inport), that copies the input parameter to the query parameter and runs the Query:

5. Save and Activate everything.
6. Open a new extension of the UI Screen COD_Account_TI, and in the Extensibility Explorer, add the generated EC, with the binding specified below:


7. Save and Activate the TI.
Business Roles Restrictions
In order to achieve the RQ02 Requirement, we can use the configuration of a custom Page Layout, assigning it then to few of the Business Roles available. The steps are explained below:
1. From the UI5 interface, select the menu voice Adapt → New Page Layout:

2. After creating the new Layout, deselect the option “Visible” from both the CHANGE LOG tab and the Monitored Customer field;
3. Select the menu voice Adapt → Assign Page Layout, and modify the options in the list as shown below:

4. Save and logon with the Sales Representative to check the result.
Final result
The final result has been shown in the pictures below.
The Change Log has been displayed as a Tab into the Account TI UI Screen, with all the tracked changes inside, sorted by hour and date of change:

Furthermore, the ACCOUNT CHANGE LOG WorkCenter (containing all the tracked changes from all the monitored Accounts in the system) gave us the result below:

About the Author
 I am Davide De Luca, and at present time I work as a Senior Consultant at Bluefin Solutions Ltd for Manufacturing Business Process, coming from several work experience as IT Specialist and SAP CRM Consultant in Capgemini, E-Utile – an ATOS WorldGrid Company and in Accenture (Rome office).
I can offer a consistent experience on System Integration oriented on the Engineering of new and innovative services and solution for small/medium and big Enterprises based on SAP Product and Services. My experience in this market is such of 8 years.
In details, I have been reaching gradually the following skills:
· Project design and deployment of enterprise resource planning services and software’s (based on SAP solutions);
· Business Implementation, Configuration, Tuning and Technical Design of IT Solutions based on SAP Cloud for Customer (C4C) landscapes and scenarios;
· Technical design and customizing of IT solutions based on system SAP CRM landscapes and scenarios;
· Project design and deployment of new services and application for business purposes for SAP NetWeaver enterprise portal solutions.
More information about Bluefin Solutions at: http://www.bluefinsolutions.com/
- SAP Managed Tags:
- SAP Business ByDesign,
- SAP Cloud Applications Studio,
- Cloud
44 Comments
You must be a registered user to add a comment. If you've already registered, sign in. Otherwise, register and sign in.
Labels in this area
-
"automatische backups"
1 -
"regelmäßige sicherung"
1 -
505 Technology Updates 53
1 -
ABAP
14 -
ABAP API
1 -
ABAP CDS Views
2 -
ABAP CDS Views - BW Extraction
1 -
ABAP CDS Views - CDC (Change Data Capture)
1 -
ABAP class
2 -
ABAP Cloud
2 -
ABAP Development
5 -
ABAP in Eclipse
1 -
ABAP Platform Trial
1 -
ABAP Programming
2 -
abap technical
1 -
absl
1 -
access data from SAP Datasphere directly from Snowflake
1 -
Access data from SAP datasphere to Qliksense
1 -
Accrual
1 -
action
1 -
adapter modules
1 -
Addon
1 -
Adobe Document Services
1 -
ADS
1 -
ADS Config
1 -
ADS with ABAP
1 -
ADS with Java
1 -
ADT
2 -
Advance Shipping and Receiving
1 -
Advanced Event Mesh
3 -
AEM
1 -
AI
7 -
AI Launchpad
1 -
AI Projects
1 -
AIML
9 -
Alert in Sap analytical cloud
1 -
Amazon S3
1 -
Analytical Dataset
1 -
Analytical Model
1 -
Analytics
1 -
Analyze Workload Data
1 -
annotations
1 -
API
1 -
API and Integration
3 -
API Call
2 -
Application Architecture
1 -
Application Development
5 -
Application Development for SAP HANA Cloud
3 -
Applications and Business Processes (AP)
1 -
Artificial Intelligence
1 -
Artificial Intelligence (AI)
4 -
Artificial Intelligence (AI) 1 Business Trends 363 Business Trends 8 Digital Transformation with Cloud ERP (DT) 1 Event Information 462 Event Information 15 Expert Insights 114 Expert Insights 76 Life at SAP 418 Life at SAP 1 Product Updates 4
1 -
Artificial Intelligence (AI) blockchain Data & Analytics
1 -
Artificial Intelligence (AI) blockchain Data & Analytics Intelligent Enterprise
1 -
Artificial Intelligence (AI) blockchain Data & Analytics Intelligent Enterprise Oil Gas IoT Exploration Production
1 -
Artificial Intelligence (AI) blockchain Data & Analytics Intelligent Enterprise sustainability responsibility esg social compliance cybersecurity risk
1 -
ASE
1 -
ASR
2 -
ASUG
1 -
Attachments
1 -
Authorisations
1 -
Automating Processes
1 -
Automation
1 -
aws
2 -
Azure
1 -
Azure AI Studio
1 -
B2B Integration
1 -
Backorder Processing
1 -
Backup
1 -
Backup and Recovery
1 -
Backup schedule
1 -
BADI_MATERIAL_CHECK error message
1 -
Bank
1 -
BAS
1 -
basis
2 -
Basis Monitoring & Tcodes with Key notes
2 -
Batch Management
1 -
BDC
1 -
Best Practice
1 -
bitcoin
1 -
Blockchain
3 -
BOP in aATP
1 -
BOP Segments
1 -
BOP Strategies
1 -
BOP Variant
1 -
BPC
1 -
BPC LIVE
1 -
BTP
11 -
BTP Destination
2 -
Business AI
1 -
Business and IT Integration
1 -
Business application stu
1 -
Business Architecture
1 -
Business Communication Services
1 -
Business Continuity
1 -
Business Data Fabric
3 -
Business Partner
12 -
Business Partner Master Data
10 -
Business Technology Platform
2 -
Business Trends
1 -
CA
1 -
calculation view
1 -
CAP
3 -
Capgemini
1 -
CAPM
1 -
Catalyst for Efficiency: Revolutionizing SAP Integration Suite with Artificial Intelligence (AI) and
1 -
CCMS
2 -
CDQ
12 -
CDS
2 -
Cental Finance
1 -
Certificates
1 -
CFL
1 -
Change Management
1 -
chatbot
1 -
chatgpt
3 -
CL_SALV_TABLE
2 -
Class Runner
1 -
Classrunner
1 -
Cloud ALM Monitoring
1 -
Cloud ALM Operations
1 -
cloud connector
1 -
Cloud Extensibility
1 -
Cloud Foundry
3 -
Cloud Integration
6 -
Cloud Platform Integration
2 -
cloudalm
1 -
communication
1 -
Compensation Information Management
1 -
Compensation Management
1 -
Compliance
1 -
Compound Employee API
1 -
Configuration
1 -
Connectors
1 -
Consolidation Extension for SAP Analytics Cloud
1 -
Controller-Service-Repository pattern
1 -
Conversion
1 -
Cosine similarity
1 -
cryptocurrency
1 -
CSI
1 -
ctms
1 -
Custom chatbot
3 -
Custom Destination Service
1 -
custom fields
1 -
Customer Experience
1 -
Customer Journey
1 -
Customizing
1 -
Cyber Security
2 -
Data
1 -
Data & Analytics
1 -
Data Aging
1 -
Data Analytics
2 -
Data and Analytics (DA)
1 -
Data Archiving
1 -
Data Back-up
1 -
Data Governance
5 -
Data Integration
2 -
Data Quality
12 -
Data Quality Management
12 -
Data Synchronization
1 -
data transfer
1 -
Data Unleashed
1 -
Data Value
8 -
database tables
1 -
Datasphere
2 -
datenbanksicherung
1 -
dba cockpit
1 -
dbacockpit
1 -
Debugging
2 -
Delimiting Pay Components
1 -
Delta Integrations
1 -
Destination
3 -
Destination Service
1 -
Developer extensibility
1 -
Developing with SAP Integration Suite
1 -
Devops
1 -
digital transformation
1 -
Documentation
1 -
Dot Product
1 -
DQM
1 -
dump database
1 -
dump transaction
1 -
e-Invoice
1 -
E4H Conversion
1 -
Eclipse ADT ABAP Development Tools
2 -
edoc
1 -
edocument
1 -
ELA
1 -
Embedded Consolidation
1 -
Embedding
1 -
Embeddings
1 -
Employee Central
1 -
Employee Central Payroll
1 -
Employee Central Time Off
1 -
Employee Information
1 -
Employee Rehires
1 -
Enable Now
1 -
Enable now manager
1 -
endpoint
1 -
Enhancement Request
1 -
Enterprise Architecture
1 -
ETL Business Analytics with SAP Signavio
1 -
Euclidean distance
1 -
Event Dates
1 -
Event Driven Architecture
1 -
Event Mesh
2 -
Event Reason
1 -
EventBasedIntegration
1 -
EWM
1 -
EWM Outbound configuration
1 -
EWM-TM-Integration
1 -
Existing Event Changes
1 -
Expand
1 -
Expert
2 -
Expert Insights
1 -
Fiori
14 -
Fiori Elements
2 -
Fiori SAPUI5
12 -
Flask
1 -
Full Stack
8 -
Funds Management
1 -
General
1 -
Generative AI
1 -
Getting Started
1 -
GitHub
8 -
Grants Management
1 -
groovy
1 -
GTP
1 -
HANA
5 -
HANA Cloud
2 -
Hana Cloud Database Integration
2 -
HANA DB
1 -
HANA XS Advanced
1 -
Historical Events
1 -
home labs
1 -
HowTo
1 -
HR Data Management
1 -
html5
8 -
Identity cards validation
1 -
idm
1 -
Implementation
1 -
input parameter
1 -
instant payments
1 -
Integration
3 -
Integration Advisor
1 -
Integration Architecture
1 -
Integration Center
1 -
Integration Suite
1 -
intelligent enterprise
1 -
Java
1 -
job
1 -
Job Information Changes
1 -
Job-Related Events
1 -
Job_Event_Information
1 -
joule
4 -
Journal Entries
1 -
Just Ask
1 -
Kerberos for ABAP
8 -
Kerberos for JAVA
8 -
Launch Wizard
1 -
Learning Content
2 -
Life at SAP
1 -
lightning
1 -
Linear Regression SAP HANA Cloud
1 -
local tax regulations
1 -
LP
1 -
Machine Learning
2 -
Marketing
1 -
Master Data
3 -
Master Data Management
14 -
Maxdb
2 -
MDG
1 -
MDGM
1 -
MDM
1 -
Message box.
1 -
Messages on RF Device
1 -
Microservices Architecture
1 -
Microsoft Universal Print
1 -
Middleware Solutions
1 -
Migration
5 -
ML Model Development
1 -
Modeling in SAP HANA Cloud
8 -
Monitoring
3 -
MTA
1 -
Multi-Record Scenarios
1 -
Multiple Event Triggers
1 -
Neo
1 -
New Event Creation
1 -
New Feature
1 -
Newcomer
1 -
NodeJS
2 -
ODATA
2 -
OData APIs
1 -
odatav2
1 -
ODATAV4
1 -
ODBC
1 -
ODBC Connection
1 -
Onpremise
1 -
open source
2 -
OpenAI API
1 -
Oracle
1 -
PaPM
1 -
PaPM Dynamic Data Copy through Writer function
1 -
PaPM Remote Call
1 -
PAS-C01
1 -
Pay Component Management
1 -
PGP
1 -
Pickle
1 -
PLANNING ARCHITECTURE
1 -
Popup in Sap analytical cloud
1 -
PostgrSQL
1 -
POSTMAN
1 -
Process Automation
2 -
Product Updates
4 -
PSM
1 -
Public Cloud
1 -
Python
4 -
Qlik
1 -
Qualtrics
1 -
RAP
3 -
RAP BO
2 -
Record Deletion
1 -
Recovery
1 -
recurring payments
1 -
redeply
1 -
Release
1 -
Remote Consumption Model
1 -
Replication Flows
1 -
Research
1 -
Resilience
1 -
REST
1 -
REST API
1 -
Retagging Required
1 -
Risk
1 -
Rolling Kernel Switch
1 -
route
1 -
rules
1 -
S4 HANA
1 -
S4 HANA Cloud
1 -
S4 HANA On-Premise
1 -
S4HANA
3 -
S4HANA_OP_2023
2 -
SAC
10 -
SAC PLANNING
9 -
SAP
4 -
SAP ABAP
1 -
SAP Advanced Event Mesh
1 -
SAP AI Core
8 -
SAP AI Launchpad
8 -
SAP Analytic Cloud Compass
1 -
Sap Analytical Cloud
1 -
SAP Analytics Cloud
4 -
SAP Analytics Cloud for Consolidation
2 -
SAP Analytics Cloud Story
1 -
SAP analytics clouds
1 -
SAP BAS
1 -
SAP Basis
6 -
SAP BODS
1 -
SAP BODS certification.
1 -
SAP BTP
20 -
SAP BTP Build Work Zone
2 -
SAP BTP Cloud Foundry
5 -
SAP BTP Costing
1 -
SAP BTP CTMS
1 -
SAP BTP Innovation
1 -
SAP BTP Migration Tool
1 -
SAP BTP SDK IOS
1 -
SAP Build
11 -
SAP Build App
1 -
SAP Build apps
1 -
SAP Build CodeJam
1 -
SAP Build Process Automation
3 -
SAP Build work zone
10 -
SAP Business Objects Platform
1 -
SAP Business Technology
2 -
SAP Business Technology Platform (XP)
1 -
sap bw
1 -
SAP CAP
2 -
SAP CDC
1 -
SAP CDP
1 -
SAP Certification
1 -
SAP Cloud ALM
4 -
SAP Cloud Application Programming Model
1 -
SAP Cloud Integration for Data Services
1 -
SAP cloud platform
8 -
SAP Companion
1 -
SAP CPI
3 -
SAP CPI (Cloud Platform Integration)
2 -
SAP CPI Discover tab
1 -
sap credential store
1 -
SAP Customer Data Cloud
1 -
SAP Customer Data Platform
1 -
SAP Data Intelligence
1 -
SAP Data Migration in Retail Industry
1 -
SAP Data Services
1 -
SAP DATABASE
1 -
SAP Dataspher to Non SAP BI tools
1 -
SAP Datasphere
9 -
SAP DRC
1 -
SAP EWM
1 -
SAP Fiori
2 -
SAP Fiori App Embedding
1 -
Sap Fiori Extension Project Using BAS
1 -
SAP GRC
1 -
SAP HANA
1 -
SAP HCM (Human Capital Management)
1 -
SAP HR Solutions
1 -
SAP IDM
1 -
SAP Integration Suite
9 -
SAP Integrations
4 -
SAP iRPA
2 -
SAP Learning Class
1 -
SAP Learning Hub
1 -
SAP Odata
2 -
SAP on Azure
1 -
SAP PartnerEdge
1 -
sap partners
1 -
SAP Password Reset
1 -
SAP PO Migration
1 -
SAP Prepackaged Content
1 -
SAP Process Automation
2 -
SAP Process Integration
2 -
SAP Process Orchestration
1 -
SAP S4HANA
2 -
SAP S4HANA Cloud
1 -
SAP S4HANA Cloud for Finance
1 -
SAP S4HANA Cloud private edition
1 -
SAP Sandbox
1 -
SAP STMS
1 -
SAP SuccessFactors
2 -
SAP SuccessFactors HXM Core
1 -
SAP Time
1 -
SAP TM
2 -
SAP Trading Partner Management
1 -
SAP UI5
1 -
SAP Upgrade
1 -
SAP-GUI
8 -
SAP_COM_0276
1 -
SAPBTP
1 -
SAPCPI
1 -
SAPEWM
1 -
sapmentors
1 -
saponaws
2 -
SAPUI5
4 -
schedule
1 -
Secure Login Client Setup
8 -
security
9 -
Selenium Testing
1 -
SEN
1 -
SEN Manager
1 -
service
1 -
SET_CELL_TYPE
1 -
SET_CELL_TYPE_COLUMN
1 -
SFTP scenario
2 -
Simplex
1 -
Single Sign On
8 -
Singlesource
1 -
SKLearn
1 -
soap
1 -
Software Development
1 -
SOLMAN
1 -
solman 7.2
2 -
Solution Manager
3 -
sp_dumpdb
1 -
sp_dumptrans
1 -
SQL
1 -
sql script
1 -
SSL
8 -
SSO
8 -
Substring function
1 -
SuccessFactors
1 -
SuccessFactors Time Tracking
1 -
Sybase
1 -
system copy method
1 -
System owner
1 -
Table splitting
1 -
Tax Integration
1 -
Technical article
1 -
Technical articles
1 -
Technology Updates
1 -
Technology Updates
1 -
Technology_Updates
1 -
Threats
1 -
Time Collectors
1 -
Time Off
2 -
Tips and tricks
2 -
Tools
1 -
Trainings & Certifications
1 -
Transport in SAP BODS
1 -
Transport Management
1 -
TypeScript
2 -
unbind
1 -
Unified Customer Profile
1 -
UPB
1 -
Use of Parameters for Data Copy in PaPM
1 -
User Unlock
1 -
VA02
1 -
Validations
1 -
Vector Database
1 -
Vector Engine
1 -
Visual Studio Code
1 -
VSCode
1 -
Web SDK
1 -
work zone
1 -
workload
1 -
xsa
1 -
XSA Refresh
1
- « Previous
- Next »
Related Content
- Top Picks: Innovations Highlights from SAP Business Technology Platform (Q1/2024) in Technology Blogs by SAP
- explore the business continuity recovery sap solutions on AWS DRS in Technology Blogs by Members
- SAP Successfactors Implementation and Maintenance in Projects in 2024 in Technology Blogs by Members
- Deep dive into Q4 2023, What’s New in SAP Cloud ALM for Implementation Blog Series in Technology Blogs by SAP
- CAP LLM Plugin – Empowering Developers for rapid Gen AI-CAP App Development in Technology Blogs by SAP
Top kudoed authors
| User | Count |
|---|---|
| 9 | |
| 9 | |
| 7 | |
| 6 | |
| 5 | |
| 4 | |
| 4 | |
| 3 | |
| 3 | |
| 3 |