
- SAP Community
- Products and Technology
- Additional Blogs by SAP
- SAP Solution Manager Basic Scenario Configuration ...
Additional Blogs by SAP
Turn on suggestions
Auto-suggest helps you quickly narrow down your search results by suggesting possible matches as you type.
Showing results for
Former Member
Options
- Subscribe to RSS Feed
- Mark as New
- Mark as Read
- Bookmark
- Subscribe
- Printer Friendly Page
- Report Inappropriate Content
09-04-2014
4:43 AM
General Information
As of August 2014, Support Stack 12 for SAP Solution Manager 7.1 is released. With the new stack, there are a number of changes to the configuration steps needed to satisfy the basic End to End Root Cause Analysis) scenario.
SAP Solution Manager configuration is managed with the SOLMAN_SETUP transaction, and this basic Root Cause Analysis (RCA) scenario consists of 3 main elements therein:

1 – The System Preparation portion, which prepares the SAP Solution Manager basic system infrastructure (web services, system repositories etc).
2 – Basic Configuration, which established the framework for the RCA scenario (as well as laying the foundation for all subsequent scenario configurations).
3 – Managed System Configuration, which connects the actual managed systems to SAP Solution Manager and enables the connections and processes that provide the SAP Solution Manager system with the requisite RCA data.
I will compare the differences in configuration between the SOLMAN_SETUP steps between support package stacks 10, 11 and 12, focusing on the first two activity areas (System preparation and Basic Configuration).
To start, as always, remember to check the most up-to-date version of the Recommended Corrections Note referenced in the collective Note 1595736. For SP12, it is SAP Note 2020219. Aside from noting the requisite Java component patch levels, it covers the entire support stack update procedure, including a
number of referenced requisite Notes.
Technical Specifics
System Preparation
1 – Maintain Users
This step has been renamed in SP12, from (Create Users to Maintain Users), and it now contains a switch to engage the Expert Mode, which provides the option to choose the namespace for the custom roles (copies of the standard). In previous SPs, this namespace defaulted to ZSAP_, without the ability to change.

The bulk of the execution of this step remains as before.
2 – Check installation
In this step for SP11, the mandatory manual step was added to check (and configure, if necessary) secure browser communications (via HTTPS).

Unfortunately, in SP11, the available linked documentation does not provide specific documentation on the specific configuration steps required:
Symptom
Most functions in SAP
Solution Manager use either BSP or Web Dynpro technology. They are based on
HTTP or HTTPS protocols. The Internet Communication Framework (ICF) provides
the infrastructure for handling HTTP requests in work processes in an SAP system
(server and client). It enables you to use standard protocols (HTTP, HTTPS, and
SMTP) for communication between systems, through the Internet. You do not need
any additional SAP program libraries. The only condition is that your system
platform is Internet-compliant. This gives you maximum flexibility in
responding to varying communication requirements.
Recommendation
For security reasons,
SAP recommends that you always use HTTPS (HTTP Secure) communication between
web browsers and your SAP systems.
Activities
You can check if HTTPS
is active in your Solution Manager system, by looking at your browser’s address
bar: if the URL you use to access Solution Manager applications starts with:
‘https://’, HTTPS is active in your system.
Even if HTTPS is active
in your system, check the items below:
Check transaction SMICM for an HTTPS service
Call transaction SMICM
(Internet Communications Manager Monitor) and select: Goto -> Services.
- Check if an HTTPS
service is active.
If an HTTPS service is not active, consult the SAP NetWeaver documentation for
instructions on setting up HTTPS communication.
If both HTTP and HTTPS services are active in your system, consider using HTTPS
exclusively.
Check table HTTPURLLOC to ensure use of HTTPS
with the SAP Web Dispatcher or other reverse proxy servers
- Call transaction SE16
(Data Browser) and view the contents of table HTTPURLLOC.
If there are no entries in this table, and you do not use a SAP Web Dispatcher
or another reverse proxy server, you do not need to perform any other actions.
If there are entries in
this table, check if there are entries for the HTTPS protocol. If there are
only entries for the HTTP protocol, add entries for the HTTPS protocol.
If there are entries for both HTTP and HTTPS, consider using HTTPS exclusively,
or changing the sort sequence, to make HTTPS the default protocol.
See the SAP documentation for further information about the use and maintenance of table HTTPURLLOC.
At SP12, the documentation now includes a link to the How-To Guide on secure configuration for SAP Solution Manager.
As well as a link to the online Help Portal section on how to configure the SAP Web Dispatcher to support SSL.
With SP12, another step was added to this area, the option to enable email encryption for notifications (such as notifications upon alerts being triggered from the Technical Monitoring scenario, as an example):

Use
This manual activity
encrypts notification E-mails that you send from an SAP system.
Symptom
For SAP_BASIS 7.30
release and lower, the SAP internal landscape does not support integrated
encryption. You must use a secure E-mail proxy solution, which tells the
external mail server to use the encryption information in the E-mail header to
encrypt E-mails.
Requirements
The SAP system requests
the proxy solution to encrypt by providing additional information in the E-mail
header. The standard solution provided by SAP adds the [encrypt] prefix to the
subject row. The external mail server should be able to recognize the [encrypt]
information attached in the E-mail header and perform the encryption. If the
proxy solution does not support this, you can add other prefixes in the subject
row, or you can use an additional header row.
Activities
- Call the transaction SCOT
- Enter the host and the port of the secure E-mail proxy in the SMTP node.
- Execute the report RSCONN05 and activate the required SAPconnect secure E-mail session.
More Information
For more information on
secure E-mail encryption, see SAP Note 149926.
With SAP_BASIS 7.31 SP2,
an integrated encryption solution is available, as described in SAP Note
1637415.
Running the RSCONN05 report yields:

Of note here is that the SCOT (SAPConnect) setup step is still formally located in the Basic Configuration area.
4 – Implement SAP Note
Naturally, the SAP Note for the individual SP stack is different:
SP10: Note 1875627
SP11: Note 1933506
SP12: Note 1969109
Other than this, the implementation of the individual notes follows the same procedure (as indicated in the Notes themselves)
5.1 – Configure Web dispatcher
In SP12, the text has been changed to better indicate the configuration options, and a link to documentation about maintenance of table HTTPURLLOC has been added:
SP10/11:

SP12:

Functionally, however, nothing has changed in the configuration here.
6.3 – Set Up SAP Solution Manager in LMDB
This is a completely new step in SP12:

In this step, you
automatically set up the SAP Solution Manager system in the Landscape
Management Database (LMDB).
This step performs the
following checks and activities:
- It checks if the LMDB is
set up correctly. You cannot proceed until the full content synchronization
with the System Landscape Directory (SLD) was completed successfully. - It checks if the related
technical systems of type Application Server (AS) ABAP and AS Java are
found in the LMDB. If they are missing, you must register the systems in the
SLD by data suppliers and wait until they are synchronized with the LMDB. - It is checked if the
required Diagnostics-Relevant indicators have been set. If they are
missing, the product instances SAP Solution Manager 7.1: Solution Manager
ABAP Stack (for AS ABAP), and SAP Solution Manager 7.1: Solution Manager
Java Stack(for AS Java) will be automatically marked as
diagnostics-relevant. - It checks if the product
system exists with the correct AS ABAP and the AS Java technical systems. If it
is missing, the product system will be automatically created. - It checks if there are
product instances of predecessor product versions of SAP Solution Manager 7.1
marked as installed. If there are any, they will be automatically removed.
Product instances assigned to product systems and logical components are not
affected. - It checks if the system
role has been defined from the perspective of IT administration. If it is
missing, you are requested to select a system role, which will be automatically
assigned to both the AS ABAP and AS Java in the LMDB.
Preconditions
You have completed the
preceding work step, Set Up LMDB.
Activities
- To define the IT admin
role, select the most appropriate system role from an IT administration
perspective from the dropdown list.
If no system role is defined in the LMDB, a suggestion based on the role of the
current client is made. The selected role will be assigned to both the AS ABAP
and AS Java in the LMDB. To correct this assignment, manually edit the
information in the editor for technical systems in transaction LMDB. - Choose Save and
Execute.
The system performs the setup and the checks mentioned above. User interaction
is only required in case of errors. - Proceed with the next
step of the guided activity.
Of Note here is that the IT Admin role defined here for the Solution Manager system may have an effect on the behavior of the Basic Configuration step 5 - Configure Automatically. More on that specific step later.
Basic Configuration
2.2 Setup Credentials
A new feature in SP12 is the ability to maintain the configuration users manually and avoid the previously required authorization checks, in case manual creation and maintenance of the setup users is required for any reason:

2.3 Maintain Users
This step has been renamed in SP12 (much like the System preparation step 1).
A new system type user has also been added in SP12:

The SM_AMSC user is a technical user that is created
automatically in transaction SOLMAN_SETUP.
The user has
authorization to run a job for the automated managed systems configuration (Managed
Systems Configuration).
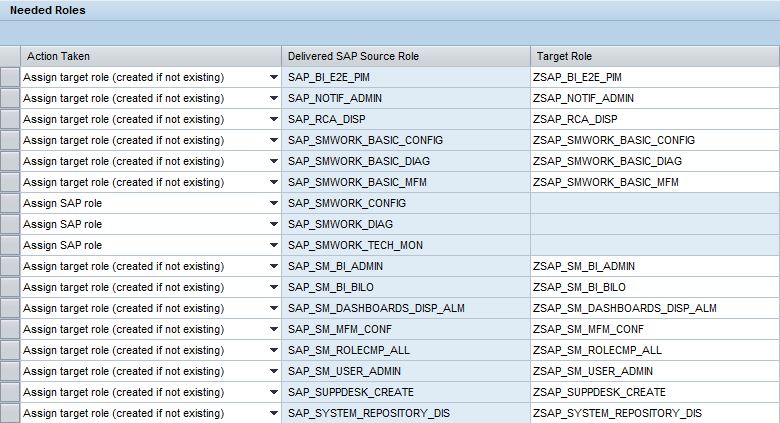
This user will be assigned the following role(s):

4 – Configure Manually
Two new optional activities have been added to this step in SP12:

Deactivate BDocs:
Use
In this activity, you
deactivate the creation of Business Document (BDoc) messages.
A BDoc is a document
that contains information on changes made to business objects.
The SAP Solution Manager
system exchanges BDoc messages with other SAP systems, such as the SAP ERP
system, using CRM middleware.
SAP Solution Manager creates BDOc messages for the following BDoc types:
- BUPA_MAIN
- BUS_TRANS_MSG
- CRM_IBASE_MESS
- PRODUCT_INDOBJ
- PRODUCT_SRV
Requirements
Check whether your SAP
Solution Manager scenarios use BDocs and which BDOcs you want to deactivate.
Activities
- To deactivate the BDoc
creation, in the Navigation column, start transaction BDoc Type
Customizing: Details (SMW3_00). - Choose New Entries.
- In Short Name,
enter the BDoc type. - Select Do Not Send.
- Save your entries.
For more information,
see SAP Note 635697.
Example
If you use Business
Partners, but do not want to exchange them with other SAP systems, deactivate
the BDoc creation for BDoc type BUPA_MAIN.
Configuration for Rapid Content Delivery:
Use
You use this activity to
configure the Rapid Content Delivery application in SAP Solution Manager for
downloading content packages automatically.
Description
The Rapid Content
Delivery application allows you to download and import up-to-date SAP Solution
Manager Content, in the form of content packages for efficient management of
day-to-day operations.
If the Configuration
for Rapid Content Delivery checkbox is activated, the background job
SM:RCD_CHECK_UPDATES checks regularly for updates of content packages, and if updates
are available, downloads them from SAP Service Marketplace into the Rapid
Content Delivery application, automatically. If it is not set to active, then
you need to check for content package updates manually, and download them with
the Rapid Content Delivery application.
In Rapid Content
Delivery, you can choose to download content packages on demand or weekly,
depending upon your requirements.
Prerequisites
- You have maintained
S-User and Password in SAP Solution Manager: Configuration work center. - You have SAP-OSS
connection created as a part of the Robomate step Specify Connectivity Data in
Basic Configuration. - In transaction SCIF, you
have maintained Global settings, and HTTP and HTTPS proxy settings to connect
to SAP servers. - In transaction STRUST,
you have registered the following certificates for the SSL Client SSL Client
(Standard) server:- GTE CyberTrust Global
Root - VeriSign Class 3 Secure
Server CA
- GTE CyberTrust Global
Activities
- Start Rapid Content Delivery Configuration.
- Select the Automatic Download of new content checkbox.
- Choose Confirm to save the changes.
5 – Configure Automatically
In SP12, the list of activities has been reorganized entirely, mainly gathering the BW specific configuration activities near the top of the list. This should make it easier to view the near-inevitable warnings regarding the BW configuration activities. With the BW system configuration items, it is important to remember 2 main caveats:
1 - The first BW step, Activate BW Source System, must be executed individually, before any other BW steps are attempted. What is especially tricky here is that the rating in Solman_Setup reflects only whether or not the background job (usually *TCO*) was started successfully, not that it ended. This job must finish, and you must have a green light in transaction RSTCO_ADMIN before you can proceed.
2 - At least two of the activities that are marked for re-execution after an update to SP12, including the activation of the RCA content, start asynchronous iterations of the CCMS_BI_SETUP job, of which only one can be active at a time. Thus, since these steps operate like the BW Source System Activation (i.e. they simply start the background job, then report success and move on), yellow warnings may occur if subsequent steps attempt to start another copy of the same job (albeit with different scenario variants).


The one new item in this list is the (optional, but still automatic) activation of BW UPL content. UPL stands for Usage and Procedure Logging, and is a kernel-based logging technology that provides runtime usage information on SAP procedure units (methods, function modules, subroutines etc.). This data is used by a number of scenarios that require data on SAP system usage (Solution Documentation Assistant, Custom Code Lifecycle management, Custom Development Management Center, Business Process Change Analyzer among others).
Use
In this automatic
activity for BW Content Activation for Usage and Procedure logging, you
activate the following objects automatically in batch processing mode:
- Main InfoArea: 0SM_SSM -
SAP Solution Manager - InfoArea: 0SM_CCL
(Custom Code Lifecycle Management) - InfoCube: 0SM_UPL (for
daily UPL data), 0SM_UPL_W (for aggregated weekly data), 0SM_UPL_M (for
aggregated monthly data), 0SM_UPL_Y (for aggregated yearly data), - All dependent objects
such as aggregates, WebTemplates and Queries
To activate the objects
manually, do the following:
- In the SAP Solution
Manager BW client, start transaction RSA1. - Navigate to the BI
Content section and activate the objects.
Requirements
Before activating the BW
content, make sure that object changes are allowed both for the BW client and
the software component LOCAL. To do so, proceed as follows:
- To check whether object
changes are allowed for the software component LOCAL, start transaction SE03 in
the BW system (which is normally the system of your SAP Solution Manager), and
choose Transport Organizer Tools --> Administration --> Set System
Change Option in the navigation bar with a double click. - In the Software
Component table, make sure that the software component Local
Developments (No Automatic Transport) (technical name LOCAL) is set
to Modifiable. - Save your changes.
- To check whether object
changes are allowed in the BW client, choose the Client Setting pushbutton,
go to change mode, and choose the BW client with a double click. - On the screen Change
View “Clients”: Details, make sure that in the group frame Cross-Client
Objects Changes, changes are allowed to repository and cross-client
customizing. - Save your changes.
The behavior of one of the updated activities has changed in SP12. The scheduling of the Solution Manager background jobs:

is now dependent on the IT-Admin role of the Solution Manager system (set back in System Preparation 6.3).
If:
- The Solution Manager system is listed under the IT-Admin role Production, and
- The activation contains jobs that require communication with the SAP Support backend, and
- The job has either not yet been scheduled, or was scheduled prior to an SAP Solution Manager upgrade,
then it is required to manually confirm the scheduling of the jobs in question. The link for this new manual approval process is located in the activity log:
![]()
Following the URL leads to the manual job scheduling planning application:

This application also includes the list of jobs to be evaluated for scheduling:

The job name is actually a link to a popup which explains the function of the selected background job.
Once the decision is made whether or not the background job is needed for a non-production Solution Manager system, the Confirm Future State status can be set to either 'Not scheduled' or 'Scheduled'.
The selection is then applied upon clicking the 'Confirm' button at the top of the application.
If the system is listed as IT-Admin role Production (or if not all the prerequisites apply to the background jobs list), the scheduling can be executed from the activities list. the background jobs are then started in sequence by an asynchronous background job, with progress reported in sequence to the activity log. unfortunately, this means that the initial yellow warnings tend to drop off the visible entries of said log rather quickly and are no longer immediately apparent:

This may cause confusion, as subsequent attempts at execution (before all jobs have been activated) will result in a warning message indicating the inability to re-execute. Runtime of this background job has been limited to 120s*(number of jobs), as the maximum time given to complete activation of each single background job has been limited to 120 seconds each. This was done to accelerate the execution of this activity.
Section 6 – Configure Engagement Report:

This section has been eliminated in SP12
7 – Create Configuration Users (Formerly step 8 in SP10/11)
The list of scenario configuration users has been extended, adding two extra users:

MFM (Message Flow Management) is a sub-scenario of Technical Monitoring.
The MF Monitoring configuration user can perform the following activities:
- Perform and administer technical configuration
- Create users and assign roles
- Call Technical Monitoring, Root Cause Analysis, and Solution Manager Configuration
work centers - PI overview monitoring
- PI component monitoring
- PI channel monitoring
- PI message monitoring
- Perform Root Cause Analysis
- Create incidents and notifications
The roles that are assigned to this user:
ITTM stands for IT Task Management.
The ITTM configuration user can perform the following activities:
- Technical configuration
- Create users and assign roles
- Call Technical Administration work center
The required roles are:

EarlyWatch Alert Management
As of SP11, the standard initial Solution (SAP Solution) under which the SAP Solution Manager system is first registered in step 1 of the Basic Configuration is no longer a valid source for EarlyWatch Alert (EWA) Management setup:

Systems registered only in this solution will not appear in the system list for EWA Management step 2 – Activate EWA, even if SAP Solution (or All) is selected:

This will happen even if the system is in the list for step 1 – Check Prerequisites.
Hopefully, this blog post has provided some information on what is new with SAP Solution Manager 7.1 SP12 with respect to the basic RCA scenario configuration.
Related Content
- SAP Build Process Automation Pre-built content for Finance Use cases in Technology Blogs by SAP
- New 1H 2024 SAP Successfactors Time (Tracking) Features in Human Capital Management Blogs by SAP
- Consuming SAP with SAP Build Apps - Mobile Apps for iOS and Android in Technology Blogs by SAP
- Demystifying the Common Super Domain for SAP Mobile Start in Technology Blogs by SAP
- Composite Data Source Configuration in Optimized Story Experience in Technology Blogs by SAP