
- SAP Community
- Products and Technology
- Spend Management
- Spend Management Blogs by Members
- Creating a shopping cart in the new UI
Spend Management Blogs by Members
Check out community member blog posts about spend management and SAP Ariba, SAP Fieldglass, and SAP Concur solutions. Post or comment about your experiences.
Turn on suggestions
Auto-suggest helps you quickly narrow down your search results by suggesting possible matches as you type.
Showing results for
Yateesh_h
Active Participant
Options
- Subscribe to RSS Feed
- Mark as New
- Mark as Read
- Bookmark
- Subscribe
- Printer Friendly Page
- Report Inappropriate Content
05-09-2014
10:18 AM
This document explains the various ways a shopping cart can be created in the new SRM UI.
Through Cross-Catalogue Search
Login to the new UI and click on the ‘Search’ tab.

Enter the search term in the search box as shown above and hit Enter. The system searches for the item across MDM Catalogues, punchout catalogues and product master in the SRM system and displays the search results. The search result can be filtered along some of the standard attributes like price, category, catalogue, supplier, etc. The results can be sorted by ‘Relevance’, ‘Ascending Price’ or ‘Descending Price’ as shown in the figure below.

Click on the item to view the image (s) if any and further information on the item. The information on the item is classified into section like ‘General Description’, ‘Sustainability Details’, ‘Technical Specifications’, ‘Reviews’.

Enter the desired quantity of the item in the field provided and click on ‘Add to Cart’ button. The item will be added to the mini shopping cart on the right side of the screen.

Click on the ‘Order Cart’ button to order the cart. The details of the shopping cart will be adopted from the ‘User Settings’ or the default attributes from the
Organisation structure. The item details can be viewed by clicking the ‘Review Cart’ button. The shopping cart number will be displayed as shown above. Click ‘Done’.
Through Direct Catalogue Purchase
Login to the new UI and click on the ‘Catalogs’ tab. The MDM and punch-out catalogues configured in the system are displayed to the user.

Click on the catalogue links to go the catalogue. SAP has not introduced any changes in the catalogue purchasing in the new UI and hencethe user experience will remain the same in case of selecting and checking out the items from the MDM and punch-out catalogues.

Once the item is checked out from the MDM or punch-out catalogue, the item is added to the mini shopping cart. Click on the ‘Order Cart’ button to order the cart. The details of the shopping cart will be adopted from the ‘User Settings’ or the default attributes from the Organisation structure. The item details can be viewed by clicking the ‘Review Cart’ button.
Through Can’t Find (Describe Requirement)
Login to the new UI and click on the ‘Can’t Find’ tab.

Enter the description, internal note, product category,quantity, unit of measure, price, currency, delivery date and the preferred supplier. Click on ‘Add to Cart’ button to add the item to the mini shopping cart. To review the item in the cart, click on the ‘Review Cart’ button in the mini shopping cart.
Review Cart
Upon clicking the ‘Review Cart’ button, an overview of the shopping cart is displayed.

The overview screen displays the list of items with the ‘General Data’ on the left hand side panel. The ‘General Data’ contains information like Shopping cart number, Shopping cart name (editable), Shopping cart status, delivery address, account assignment, approval overview and the total value of the cart.
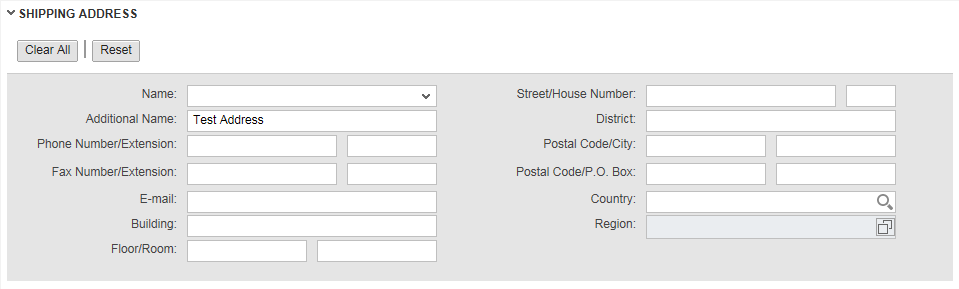
To get the details of each of the items in the cart, click on the ‘Item Details’ button against the desired line item. The item detail is split into sections. The sections are ‘Item Data’, ’Service & Delivery’, ‘Shipping Address’, ‘Account Assignment’, ‘Source of Supply’ and ‘Approval Process Overview’

The information in each of the sections is as shown below:


Through My Favourites
Login to the new UI and click on the ‘My Favorites’ tab. ‘My Favorites’ contains list of the items that the user has marked as his/her favourite. These are items frequently bought by the user. To mark an item as favourite, the user has to first search for the item in the ‘Search’ tab and then click on the favourite (STAR ) button.

All items marked as favourites are found in the ‘My Favourites’ tab. Edit the quantity field for the item and click on ‘Add to Cart’ button to add the item to mini shopping cart.

The details of the shopping cart will be adopted from the ‘User Settings’ or the default attributes from the Organisation structure. The item details can be viewed by clicking the ‘Review Cart’ button. The shopping cart number will be displayed as shown above. Click ‘Done’.
Through Templates
Template shopping cart can be created by the Operational Purchaser and is then published to the users. Such shopping carts appear in this tab. The user can create shopping carts from these templates.
My Carts
Login to the new UI and click on the ‘My Carts’ tab. ‘My Carts’ contains a list of all the shopping carts created by the user. The user can select items from these shopping cart sand add them to mini shopping cart to create shopping carts.
Click on the ‘Expand’ button next to the required shopping cart.

Select the required items by checking the box against the corresponding line items. Then click on the ‘Add Items to Cart’ button to add the items to the mini shopping cart.
- SAP Managed Tags:
- SAP Supplier Relationship Management
13 Comments
You must be a registered user to add a comment. If you've already registered, sign in. Otherwise, register and sign in.
Labels in this area
Related Content
- SAP SRM Technical Scenarios – Decision Matrix (2010 re-print) in Spend Management Blogs by Members
- How to disable delete button on shopping cart lines for which there is a PO line created in Spend Management Q&A
- Vendor Goods evaluation survey in Spend Management Q&A
- Why are UNSPSC codes important to a Supplier in the eProcurement space? in Spend Management Blogs by SAP
- Change approver in Shopping Cart in Spend Management Q&A