Last month I had an interesting call with schneider.mic and thomasfiedler. They introduced the ABAP Development Tools Standard Development Kit (SDK) to me and in this document I want to share what they told me.
What do I need to start?
First of all you only need the ABAP Development Tools installed in your Eclipse environment (there are enough blogs and documents which describe how to get and install ADT). That's all - you don't need to download any additional jar files or something like that. The ADT SDK is delivered within your ADT installation, thus starting is very convenient.
I really recommend to read this post Software Development Kit for the ABAP Development Tools by christopher.kaestner. A little Java knowledge is necessary but you don't have to be an expert - there are a lot templates you can use and by a little curiosity you will succeed in enhancing ADT for your requirements (that's the aim of this SDK).
The first Eclipse plug-in project
Hello World is easy to say in every programming language and environment - so let's go. It should look like this:

Well, as this should be a step-by-step guide (the reason for all the screenshots, thought it was the best way to explain, maybe it's not sustainable to print it in color ;-)) you have to start your Eclipse and use the right mouse click to open the context menue for creation of a new project - like in the picture below. Please consider that the explanations are placed above the screenshots.

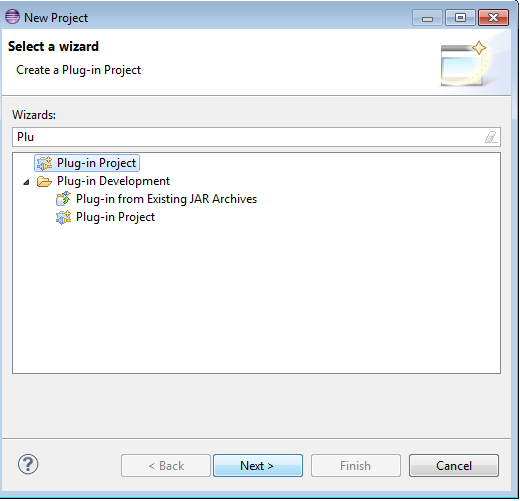
The next popup needs to know which kind of project you want to create - choose "Plug-In-Project" (this is an Eclipse standard project, this is not part of the SDK; Eclipse delivers this possibility by default as it's an open platform):
On the following screens I used to give a project name and don't change the default parameters:


Templates are very useful. They provide an easy to use approach for starting with Eclipse plug-in projects. For our example we choose the "Hello, World Command" which enables us to create a new toolbar-button and a new entry in the menu bar as well (have a look at the last two screenshots):

Your screen should look like this:

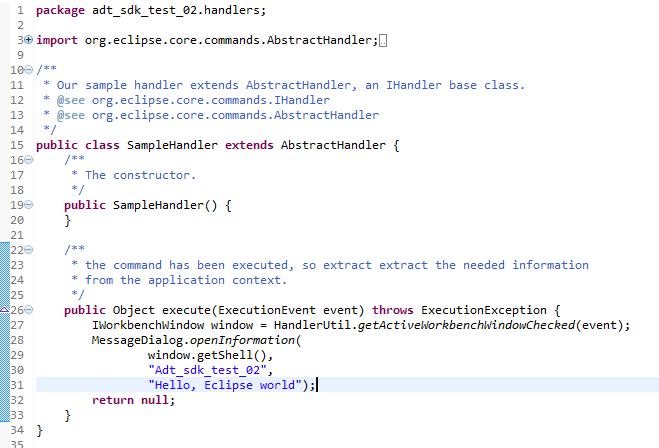
The plug-in project wizard generates all of the required artefacts so we just have to put a little coding into the generated stub later on. The following screen displays the overview of the project (based on the plugin.xml file you can see within the project tree on the left). Verify that you are in the "Plug-In Development" perspective.

On the "Extensions" tab you have to verify that your SampleHandler.class is mentioned in the field named "class". The class is assigned as a handler for the generated "command" (the command is fired and the handler listens to its events). The "command" is responsible for representing the user-function within the toolbar (e.g. tooltip, icon...). The handler class implements the corresponding logic in a loose coupled way.

We will have a closer look at the possibilities in the second part of this blog.
The aim of our button is to display a message dialog to show the "Hello World" to the user.
Testing is easy as well. By default Eclipse is delivered with a default runtime configuration for testing so called "Eclipse Applications". So just press the Run button at the top right of the Overview:

As result a temporary Eclipse instance should come up with one "red dot" as a new button (here are two because I tried it before ;-)):

You can try the menu item created as well. In both cases the popup will appear.

The next step is to create an individual transaction launcher based on the approach shown in this blog.
Let me know if you've got issues or questions about this topic.
Cheers and happy coding to all 🙂
Martin
