
- SAP Community
- Products and Technology
- CRM and Customer Experience
- CRM and CX Blogs by Members
- How to enable cell click for tables
CRM and CX Blogs by Members
Find insights on SAP customer relationship management and customer experience products in blog posts from community members. Post your own perspective today!
Turn on suggestions
Auto-suggest helps you quickly narrow down your search results by suggesting possible matches as you type.
Showing results for
Former Member
Options
- Subscribe to RSS Feed
- Mark as New
- Mark as Read
- Bookmark
- Subscribe
- Printer Friendly Page
- Report Inappropriate Content
10-20-2013
5:49 AM
Introduction
In general any table view created in CRM Web UI supports selection of a particular row in the table. Based on the business needs we can set
the table as Single/Multi row select. This can be achieved by setting the table attribute “selectionmode”. However sometimes we might have a requirement to select a particular cell in the table. This cannot be easily achieved by simple configuration or table attributes. The document explains the detailed steps
involved in enabling Cell click for the Tables.
Example Business Requirement
Let us take an example to learn this concept.

The picture above shows the table of time slots for each date and the user can select any of the avialable time slot by clicking on the trafic light. Once the time slot is selected the traffic light truns to tick mark. This a typical screen which is required for scheduling appointments for the service personnel based on his availability.
Technical Implementation
Let’s now see the steps involved in creating the table as per the above requirement.
- Open the BSP Component Workbench using the transaction BSP_WD_CMPWB.
- Select the component in which you would like to create the table view.
- Create a new view e.g. ZTIMESLOT.

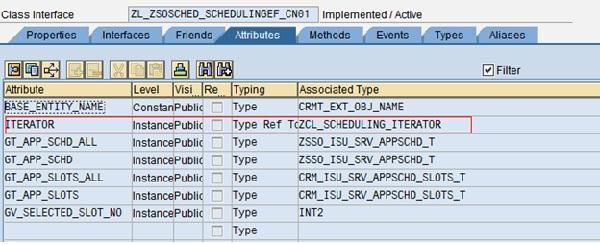
4. Create Model node/Value node on which the table will be built. Also add necessary attributes to the node as shown below


5. Select the view type as “table” and create the view.
6. Create View configuration and display all the attributes that you would like to see it on the table.
Until the above step, a normal table view is generated with single/Multi row select enabled. In order to enable the cell selection we need to implement view iterator class.
7. Create a class in SE24 and inherit the interface IF_HTMLB_TABLEVIEW_ITERATOR to it.

8. Create an attribute in the iterator class referring to the context node. This is required so that we can read the content of the cell inside iterator methods.

You can set the context node inside the constructor method.
9. Implement the iterator method IF_HTMLB_TABLEVIEW_ITERATOR~RENDER_CELL_START for adding the events to each cell.

This method will be called individually for every cell that is formed for the table. So the approach is to add an Icon to each cell along with its text and enable the event for them.
Note: A normal text element in the table cell cannot be selected. So we need to add some other element, which supports events e.g. Icon, Checkbox, Radio button and etc., along with the text. In this example we are using the icons.
Sample code:
METHOD if_htmlb_tableview_iterator~render_cell_start.
DATA:
lr_image TYPE REF TO cl_thtmlb_image,
lr_bee_table TYPE REF TO cl_bsp_bee_table,
lr_text_element TYPE REF TO cl_thtmlb_textview.
DATA:
lv_icon TYPE string,
lv_temp TYPE string,
lv_value_path TYPE string,
lv_model_name TYPE string.
* Render icons for each DAYxx cell
CREATE OBJECT lr_bee_table.
CREATE OBJECT lr_image.
* Convert icon code into URL and prepare bee
lv_icon = cl_bsp_mimes=>sap_icon( id = '@08@' ).
lr_image->src = lv_icon.
* event
name for the cell
lr_image->onclick = 'cell_click'
* Get slot number and store in ID field, so later in the event handler we can get the slot information:
* Retrieve text value of current cell
CALL METHOD cl_bsp_model=>if_bsp_model_util~split_binding_expression
EXPORTING
binding_expression = p_cell_binding
IMPORTING
attribute_path = lv_value_path
model_name = lv_model_name.
lv_temp = gr_context_node->if_bsp_model_binding~get_attribute( attribute_path = lv_value_path ).
lr_image->id = lv_temp.
lr_text_element = cl_thtmlb_textview=>factory(
text = lv_temp
tooltip = lv_temp ).
* Add the text
lr_bee_table->add( element = lr_text_element ).
* Add Icon to the text
lr_bee_table->add( element = lr_image ).
p_replacement_bee = lr_bee_table.
ENDMETHOD.
As you see in the code we are adding the traffic light icon to each cell and the event defined for them is “cell_click”. Also the content of the cell is set to the image ID.
10. Create an instance attribute for the iterator class (created in step-7) in the context node.
Now implement the constructor class and paste the following code.
IF NOT iterator IS BOUND.
CREATE OBJECT iterator
EXPORTING
ir_context_node = me.
ENDIF.
11. Create an event handler for the event “cell_click”. As you see in the sample code (step 8), for any Cell that is clicked in the table we are raising the same event ‘cell_click’. In order to differentiate which cell has been clicked in the table we need to read the content of the cell which is set in the image id. It can be read as follows:
DATA:
lr_event TYPE REF TO cl_thtmlb_image,
lv_text Type string.
lr_event ?=htmlb_event_ex.
CHECK lr_event IS BOUND.
lv_text =
lr_event->if_htmlb_data~event_id.
The field lr_event->if_htmlb_data~event_id contains the content of the cell.
11. Finally edit the “.htm” file for the view and add the “iterator” parameter to table tag as shown below.

- SAP Managed Tags:
- SAP Customer Relationship Management
You must be a registered user to add a comment. If you've already registered, sign in. Otherwise, register and sign in.
Labels in this area
-
ABAP
1 -
API Rules
1 -
CRM
1 -
Custom Key Metrics
1 -
Customer Data
1 -
Determination
1 -
Determinations
1 -
Introduction
1 -
KYMA
1 -
Kyma Functions
1 -
open SAP
1 -
Sales and Service Cloud Version 2
1 -
Sales Cloud v2
1 -
SAP
1 -
SAP Community
1 -
SAP CPQ
1 -
SAP CRM Web UI
1 -
SAP Customer Data Cloud
1 -
SAP Customer Experience
1 -
SAP Integration Suite
1 -
SAP Sales Cloud v2
1 -
SAP Service Cloud v2
1 -
SAP Service Cloud Version 2
1 -
Service Cloud v2
1 -
Validation
1 -
Validations
1
Related Content
- Delete & Rename Contract Account Name from SAP Cloud for Customer (C4C) in CRM and CX Blogs by Members
- SAP Customer Data Cloud Integration with Commerce Cloud and Composable Storefront in CRM and CX Blogs by SAP
- What is planned for the 2405 release of SAP Variant Configuration and Pricing? in CRM and CX Blogs by SAP
- Implementing Dynamic Case Flows Based on Case Type in CRM and CX Blogs by Members
- CRM Basic Technical Info for ABAPers in CRM and CX Blogs by Members