SAP QUERIES
Document Objective
This document aims at explaining the concept of ABAP/4 query in a simple and straight forward manner. The Reader of this document should have a moderate knowledge of ABAP concepts and authorizations for Understanding the concept of ABAP query.
Why Queries?
Many times a need arises for SAP Users and Functional Consultants to generate quick reports without getting any ABAP coding done – time taken to complete the coding in development, transport and test it in QA system and then transport to production – is sometimes too long. In such cases, ABAP/4 query is a tool provided by SAP for generating these kind of reports.
ABAP/4 query can be designed in four steps:
- 1. Creation of a user group
- 2. Creation of Info Set
- 4. Creation of the query
Below are the Transaction Code users for Creating Query-
1. SQ03 - User group
2. SQ02 - Info Set
3. SQ01 - ABAP/4 Query
Creation of User Group-
1. Go to Tcode-SQ03-
Give any name started with "Z” and click on Create button and then give a description for the user group.
Below is the screen shot for example-

2. After entering the description for user group click on save button and you will get below screen with message “User Group saved”

3. Then click on the above highlighted button “Assign Users and Info Sets” and enter the User Ids which are authorized to use the User Group.

Creation of Info Set-
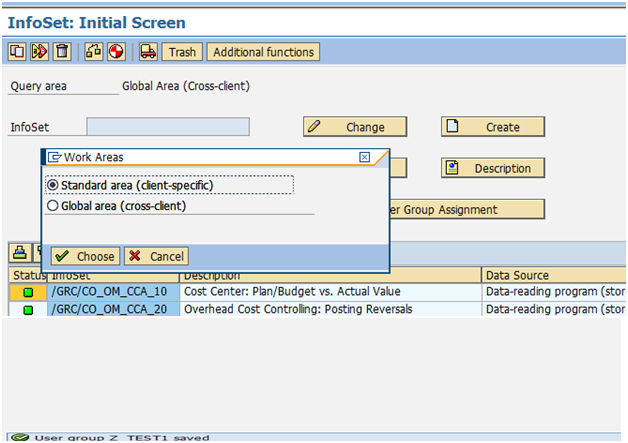
1. Go to Tcode-SQ02-
1st go to menu Environment then Query Areas and select the "Standard Area(Client-Specific)" as below.
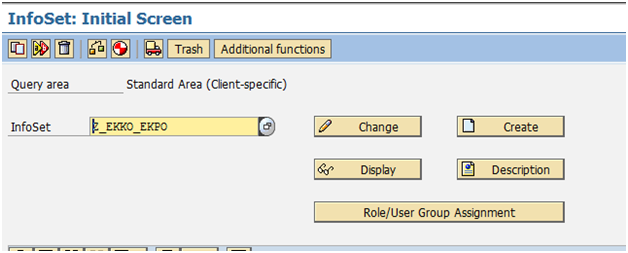
2. Give any name started with "Z” and click on Create button and then in the next screen give the name of the query and the table name which is required for join and click on continue button.
Note-If the requirement is to use only one table in the query then you have to select the radio button “Direct Read of Table”.

3. After clicking the continue button below screen will come, here you can add tables as per your requirement by clicking on the below highlighted button , and also you can add relation between any field as per your requirement


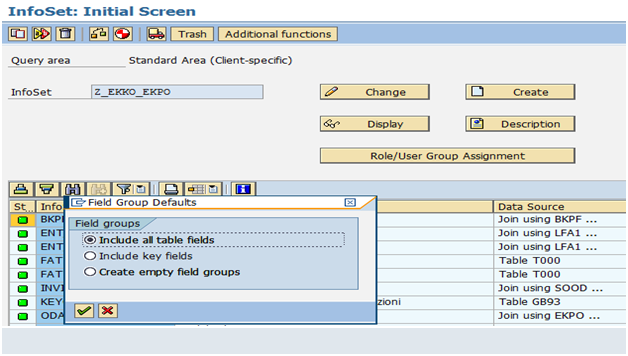
4. Then needs to click on button “InfoSet” and needs to select include all table filed as below screen shost , you cana slo check Include key fields.
5. Then need to click on below highlighted button “Extras” and then need to select tab “code” as below.
And here in Code Selection we have all events, and we can write code here.
· The new Event here is “RECORD PROCESSING".
· The most important event for this tool is Record Processing event like if you want to have any condition and calculation or modification of field value, you can write code in this event.
· Whatever you are selecting the tables for query those will joined internally as inner join under the record processing event as loop.
· One by one record will get process under "RECORD PROCESSING"

6. Then we neee to click on the Generate Button as highlighted below and we ‘ll get a messge as “Info Set Generated”


7. Then we need to assign the Info Set to the Use Group which we have created from TCode = SQ02.
Needs to Click on “Role/User Group Assignment “button .
Needs to select the User Group and click on Save Button.

Creation of Query-
1. Go to Tcode-SQ01-
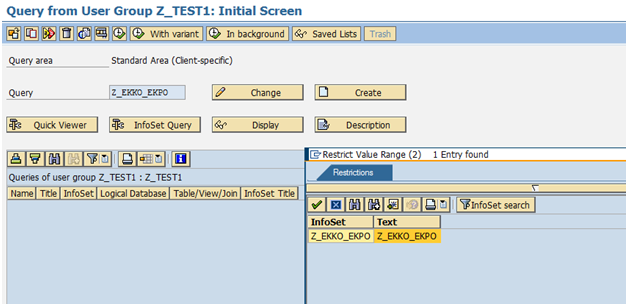
1st needs to select the User Group for which we need to create the Query , by clicking the below highlighted button.

2. Needs to give any name started with "Z” and click on Create button and the below screen will get displayed, we have select the info set for which we have to create the query.
3. And then in the below screen we have enter the Title of the Query and needs to click on button
“Basic List”.


4. In the below screen all the tables which we have added in Info Set will get displayed, we have to select the required filed which we need in selection screen and which we need in output Screen.

5. Then we can check and test the query by clicking in check and test button as highlighted above.
After executing below is the selection screen and output we get.
Selection Screen-

Output Screen-
6. We can also sort any field as per requirement.
7. For using sort for any field, we need to drag the field value form the below highlighted part and keep it under sort.

8. And after Sorting below is the output.

Transport procedure for Query—
Needs to go to Tcode-SQ02.
Then go to Transport of Environment Menu as below.

For transporting query we can use below 2 method-
· Export and Import Method
· Download and Upload method.
· Export and Import Method –
1. Needs to select radio button Export and Transport Info set and Queries , and needs to pass the query and Info Set name as given below.

2. Then click on Execute. This will create an internal transport request as follows. Note down the transport Request number.

3. Then, once the above transport request is released and transported follow the same procedure in the target client, but now this time with import radio button selected as below.
4. Remember to enter the transport request number in the dataset field, at the very bottom of the screen. Also select the Transport Info set and queries radio button under transport option selection.

Then click on Execute.

· Download and Upload method.
1. In this method we can download the query from development system and upload it in quality system.
2. Needs to select radio button Download and Transport Info set and Queries and needs to pass the query and Info Set name as given below. Then Execute.

Then It will ask the path to save the Query .

Then, needs to follow the same procedure in the target client, but now this time with Upload radio button
And then needs to select the downloaded query from your system.
Happy Querying!!
