This document shows you how easy it can be to create custom queries in the SAP Sourcing and Contract Lifecycle Management solutions.
I hope it could be a starting point and encourage you as an admin to try out building own queries that your business is asking for. The example is a real-life requirement from one of our customers for an easy monitoring of system activity of their supplier contacts.
The result can be seen on the screenshot below: A list of all supplier contacts with the time of their last login.

Figure 1: The result is a list of Supplier Contacts with their last login date
Step 1: Find a standard query that you can use as a starting point
You should always try to find a standard query that is already close to your given requirements. SAP Sourcing has hundreds of standard queries that you find in Setup->System Setup->Query Definition. After you found one, open and duplicate it. For this specific example, we found the query 'Supplier and Contacts' which contains almost all result fields that we needed. We could have named the new query definition to something more explanatory, like "Supplier Login Monitor".

Figure 2: Duplicate a standard query
Step 2: Change the collection of "Result Fields"
In your new query you can now add new fields and remove existing fields from the result set. It will depend on the origin of new fields if you will also need to change the SQL statement on tab 'Query'. The only field that was missing in our example is the date of last login. We were lucky that this field is part of one of the database columns already used in the query, so that no changes to the SQL command was needed. The new field will be generated into the runtime query string as part of the <%RESULTS%> token.
The screenshots show how this field was added and how other fields were removed.

Figure 2: Add new field to the result set
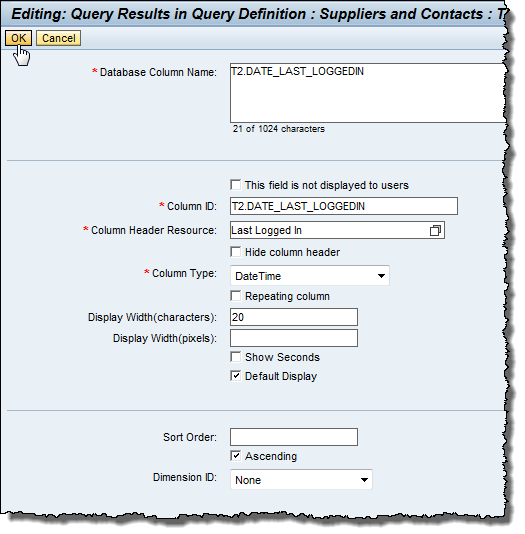
Figure 4: Details of new result field

Figure 5: Remove unnecessary fields from the result set
Last Step: Check result and publish your query
The new query is ready and can be tested now. You could make it available as a workbench channel, as part of a report or a search for your end users now.
Tip: Look at the online help. It is very well developed and quite helpful in questions around query and report design.
