
- SAP Community
- Products and Technology
- Technology
- Technology Blogs by SAP
- SSL with HANA and BI4 Feature Pack 3
Technology Blogs by SAP
Learn how to extend and personalize SAP applications. Follow the SAP technology blog for insights into SAP BTP, ABAP, SAP Analytics Cloud, SAP HANA, and more.
Turn on suggestions
Auto-suggest helps you quickly narrow down your search results by suggesting possible matches as you type.
Showing results for
Former Member
Options
- Subscribe to RSS Feed
- Mark as New
- Mark as Read
- Bookmark
- Subscribe
- Printer Friendly Page
- Report Inappropriate Content
05-30-2012
7:54 PM
Secure Sockets Layer (SSL) with HANA and BI4 Feature Pack 3 requires configuration on the HANA server and BI4 server. The following steps will show how to configure SSL using OpenSSL and a certificate obtained by from a Certificate Authority (CA).
OpenSSL Configuration
This blog will cover the OpenSSL Crypto Library, however HANA can also be configured using the SAP Crypto Library.
Confirm that OpenSSL is installed
shell> rpm -qa | grep -i openssl
openssl-0.9.8h-30.34.1
libopenssl0_9_8-32bit-0.9.8h-30.34.1
openssl-certs-0.9.8h-27.1.30
libopenssl0_9_8-0.9.8h-30.34.1
Confirm that OpenSSL is 64-bit
shell> file /usr/bin/openssl
openssl: ELF 64-bit LSB executable, x86-64, version 1 (SYSV), for GNU/Linux 2.6.4, dynamically linked (uses shared libs), stripped
Confirm there is a symlink to the libssl.so file

If not, create one as the root user
shell> ln -s /usr/lib64/libssl.so.0.9.8 /usr/lib64/libssl.so
SSL Certificates
This blog won’t go into details of how SSL works, but in generic terms you’ll need to create a Certificate Singing Request (CSR) from the HANA server and send that to a CA. In return, the CA will give you a Signed Certificate and a copy of their Root CA Certificate. These, then need to be setup with HANA and the BI4 JDBC and ODBC drivers.
Creating the Certificate Signing Request
shell> openssl req -new -nodes -newkey rsa:2048 -keyout Server_Key.key -out Server_Req.csr -days 365
Fill out the requested information according to your company:
-----
You are about to be asked to enter information that will be incorporated
into your certificate request.
What you are about to enter is what is called a Distinguished Name or a DN.
There are quite a few fields but you can leave some blank
For some fields there will be a default value,
If you enter '.', the field will be left blank.
-----
Country Name (2 letter code) [AU]:
State or Province Name (full name) [Some-State]:
Locality Name (eg, city) []:
Organization Name (eg, company) [Internet Widgits Pty Ltd]:
Organizational Unit Name (eg, section) []:
Common Name (eg, YOUR name) []:
Email Address []:
Please enter the following 'extra' attributes
to be sent with your certificate request
A challenge password []:
An optional company name []:
This will create two files
- Key: Server_Key.key
- CSR: Server_Req.csr
The CSR needs to be sent to the CA, which in turn will give you a signed certificate and their Root CA Certificate.
Convert the Root CA Certificate to PEM
The Root CA Certificate may come in the DER format (.cer extension), HANA requires the cert in PEM format. Therefore, we will need to convert it using the command
shell> openssl x509 -inform der -in CA_Cert.cer -out CA_Cert.pem
HANA SSL Configuration
Copy both the Signed Cerficiate and Root CA Certificate to the HANA server. For HANA SSL to work, we need to create two files:
- key.pem
- trust.pem
The key.pem key store file contains the certificate chain, which includes your servers key (Server_Key.key), the CA’s Signed Certificate and the Root CA Certificate. Whereas the trust.pem trust store file contains the Root CA Certificate.
Create the key.pem and trust.pem trust stores
key.pem
shell> cat Server_Cert.pem Server_Key.key CA_Cert.pem > key.pem
trust.pem
shell> cp CA_Cert.pem trust.pem
Copy the files to the user's home directory
In the user's home directory create a .ssl directory and place both the key.pem and trust.pem files here,

Configure the certificates in HANA
Once the key.pem and trust.pem files have been created they need to be configured in HANA.
In HANA Studio go to
- Administration
- Configuration tab
- Expand indexserver.ini
- Expand communication
- Configure the entries related to SSL

Start and Stop HANA to pick up the SSL configuration
- HDB stop
- HDB start
HANA Studio Configuration
When setting up the connection to HANA, check the option 'Connect using SSL', as seen below.

To confirm the connection has SSL, look for the lock icon on the server icon, as seen below.

BI4 Feature Pack 3 SSL Configuration
SSL in BI4 needs to configured for the HANA connectivity you plan to use.
JDBC Configuration
For JDBC SSL configuration, we’ll need to add the trust.pem trust store to the Java Key Store (JKS) using the keytool utility provided by the JDK/JRE. This is done via the command line. Change the paths for your own configuration:
Add trust.pem to the JKS
C:\Documents and Settings\Administrator>"C:\Program Files (x86)\SAP BusinessObjects\SAP BusinessObjects Enterprise XI 4.0\win32_x86\jre\bin\keytool.exe" -importcert -keystore "C:\Program Files (x86)\SAP BusinessObjects\SAP BusinessObjects Enterprise XI 4.0\win32_x86\jre\lib\security\cacerts" -alias HANA -file trust.pem
You will be prompted for the keystore password. The default password is: changeit
When prompted to 'Trust this certificate' enter yes. The alias can be any value, however it must be unique in the keystore.
Confirm that your certificate has been added to the keystore
C:\Documents and Settings\Administrator>"C:\Program Files (x86)\SAP BusinessObjects\SAP BusinessObjects Enterprise XI 4.0\win32_x86\jre\bin\keytool.exe" -list -keystore "C:\Program Files (x86)\SAP BusinessObjects\SAP BusinessObjects Enterprise XI 4.0\win32_x86\jre\lib\security\cacerts" -alias HANA
If successful, you will see trustedCertEntry in the output, as below

Information Design Tool (IDT) Configuration
In IDT, the connection will need to be setup with the JDBC Driver Property encrypt=true to make the connection use SSL when connecting to HANA,

ODBC Configuration
Once the HANA client driver has been installed, you can set up a ODBC connection for HANA. To connect via SSL, check the box 'Connect using SSL', as below:

If you added any Special property settings', they won't be displayed in the driver configuration. To view them, launch the Windows Registry Editor and go to the key:
- HKEY_LOCAL_MACHINE\SOFTWARE\Wow6432Node\ODBC\ODBC.INI\<Your Data Source Name>

Installing the CA Root Certificate
Depending on which CA you get the certificate signed from, you may run into SSL errors. For example, in Crystal you may see this error,

To resolve this, install the CA Root Certificate allowing it to be trusted by the server.
- Copy the CA Root Certificate to the machine where the error is coming from
- Double click on the certificate and click 'Install Certificate'

- Click next
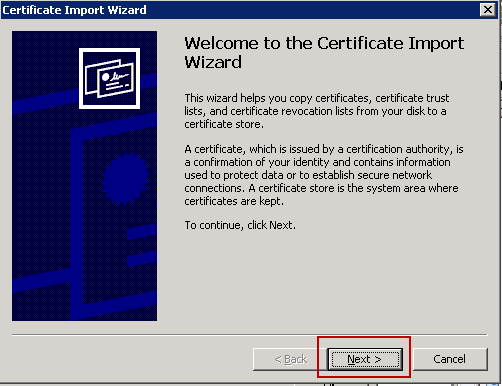
- Select the first option and click next

- Click finish

Confirming if SSL is being used
Using a tool like Wireshark, the communication between the server and client can be traced, as seen below to verify that SSL is being used.

- SAP Managed Tags:
- SAP HANA
5 Comments
You must be a registered user to add a comment. If you've already registered, sign in. Otherwise, register and sign in.
Labels in this area
-
ABAP CDS Views - CDC (Change Data Capture)
2 -
AI
1 -
Analyze Workload Data
1 -
BTP
1 -
Business and IT Integration
2 -
Business application stu
1 -
Business Technology Platform
1 -
Business Trends
1,661 -
Business Trends
88 -
CAP
1 -
cf
1 -
Cloud Foundry
1 -
Confluent
1 -
Customer COE Basics and Fundamentals
1 -
Customer COE Latest and Greatest
3 -
Customer Data Browser app
1 -
Data Analysis Tool
1 -
data migration
1 -
data transfer
1 -
Datasphere
2 -
Event Information
1,400 -
Event Information
65 -
Expert
1 -
Expert Insights
178 -
Expert Insights
280 -
General
1 -
Google cloud
1 -
Google Next'24
1 -
Kafka
1 -
Life at SAP
784 -
Life at SAP
11 -
Migrate your Data App
1 -
MTA
1 -
Network Performance Analysis
1 -
NodeJS
1 -
PDF
1 -
POC
1 -
Product Updates
4,577 -
Product Updates
330 -
Replication Flow
1 -
RisewithSAP
1 -
SAP BTP
1 -
SAP BTP Cloud Foundry
1 -
SAP Cloud ALM
1 -
SAP Cloud Application Programming Model
1 -
SAP Datasphere
2 -
SAP S4HANA Cloud
1 -
SAP S4HANA Migration Cockpit
1 -
Technology Updates
6,886 -
Technology Updates
408 -
Workload Fluctuations
1
Related Content
- ABAP Cloud Developer Trial 2022 Available Now in Technology Blogs by SAP
- New Machine Learning features in SAP HANA Cloud in Technology Blogs by SAP
- Capture Your Own Workload Statistics in the ABAP Environment in the Cloud in Technology Blogs by SAP
- SAP Enable Now setup in Technology Blogs by Members
- explore the business continuity recovery sap solutions on AWS DRS in Technology Blogs by Members
Top kudoed authors
| User | Count |
|---|---|
| 13 | |
| 10 | |
| 10 | |
| 9 | |
| 7 | |
| 6 | |
| 5 | |
| 5 | |
| 5 | |
| 4 |