
- SAP Community
- Products and Technology
- Additional Blogs by SAP
- Using Neo and SAPUI5 - Part 2 - Hi SAP UI5, may I ...
Additional Blogs by SAP
Turn on suggestions
Auto-suggest helps you quickly narrow down your search results by suggesting possible matches as you type.
Showing results for
Advisor
Options
- Subscribe to RSS Feed
- Mark as New
- Mark as Read
- Bookmark
- Subscribe
- Printer Friendly Page
- Report Inappropriate Content
05-04-2012
12:13 PM
In my first blog of this series we've prepared the development environment to be able to start developing with Neo and SAP UI5. In this blog post we'll create our first SAP UI5 app and will deploy it on Neo. We'll not create a "Hello world" app, but try to be a bit more sophisticated. This app will be the ground for the next blog posts where we'll add persistence to our app and secure it properly.
Ok. Let's go.
The Tweets Persistence App
One of the most important goals I have with this blog series is also to address some issues you might face during your day-to-day work with SAP UI5 and Neo. For that the app needs to fulfill certain requirements. The app needs to
- look good 🙂
- read and write data into the persistence layer of Neo
- be able to handle asynchronous events
- be secured in a way that only certain users can access it
- use both JPQL and native SQL queries
Therefore we'll build an app that will persist tweets messages for specific search terms. The user will have two tables, where the first contains the a list of search terms and the second table the corresponding tweets for it.
So first of all we'll create the UI in SAP UI 5.
Setting up the project
Let's use the project that you've created in the first part of this blog series. Rigth-click on the project name, click on "Refactor", "Rename" and give it another name. We'll use the name "tweetsApp".

After that we delete some files that we don't need for our project. Let's switch to the Java perspective (Eclipse menu "Window", "Open Perspective", "Java") and delete the following files:
- WebContent/index.jsp
- WebContent/resources (all files and the resources directory itself)
- WebContent/test-resources (all files and the resources directory itself)

Now double-click the index.html file under the WebContent folder, delete all the text in it and substitute it with the following code and save the index.html file.
<!DOCTYPE HTML>
<html>
<head>
<meta http-equiv="X-UA-Compatible" content="IE=edge" />
<title>Tweets Persistence App</title>
<script
src="./resources/sap-ui-core.js"
type="text/javascript"
id="sap-ui-bootstrap"
data-sap-ui-libs="sap.ui.ux3, sap.ui.commons, sap.ui.table"
data-sap-ui-theme="sap_goldreflection">
</script>
<script type="text/javascript">
var aContent = {};
// Create a SAP UI5 shell element
var oShell = new sap.ui.ux3.Shell("tweetAppShell", {
appIcon : "http://www.sap.com/global/images/SAPLogo.gif",
appTitle : "Tweets Persistence App",
});
// And now add so called WorksetItems to the shell
// Each WorksetItem consists in our case of a NavigationItem
// Notice that each Navigation Item is accessible via a unique key!
var WI = sap.ui.ux3.NavigationItem;
oShell.addWorksetItem(new WI({key : "wi_home", text : "All Tweets"}));
oShell.addWorksetItem(new WI({key : "wi_tweets", text : "Tweets per hashtag"}));
// Just take the shell and place it in the html area called shellArea
oShell.placeAt("shellArea");
</script>
</head>
<body class="sapUiBody" >
<!-- And here is the div element shellArea where the shell element will be posted to-->
<div id="shellArea"></div>
</body>
</html>
Let's deploy it and see what happens.
Open your browser and enter the address http://localhost:8080/tweetsApp/index.html (or another port than 8080).
You should now see something like this

The SAP UI5 library generate a lot of things for you without having to write a lot of code. For example you can click on the two navigation tabs and you'll get a nice transition animation. Additionally SAP's "gold reflection" theme has been applied to our app. There are other themes you can try out, but I like the gold reflection theme a lot so I'll stay with it for now.
The app still looks very empty because we haven't any elements assigned to the navigation items. We'll change that now.
Adding UI Elements
Our app will show in the "All Tweets" tab a list of all tweets that have been persisted in our database.
The tab "Tweets Per Hashtag" will show a list of hashtags we want to monitor and another list with the tweets for a selected hashtag.
To make it as easy as possible, we'll use the DataTable element of SAP UI5.
Tools like the one I'm using here tend to grow a lot once you find them useful. You add a feature here, a nice goodie there and suddenly you have a code monster in front of you that is hard to maintain. Therefore we'll take care from the very beginning to keep our code as maintainable and readable as possible.
Firstly we'll create a separate JavaScript file to handle the creation of tables in our app. For that we'll create a new folder in our WebContent folder called "tools" and a file called "buildTable.js".

The directory should look now like this:

To be able to access this JavaScript code in our app we'll have to add the reference to it at the beginning of our index.html file.
<script type="text/javascript" src="tools/buildTable.js"></script>
We'll first take care of the smalest element of the DataTable: a column. We want to have column elements that just show text, another one that shows text with a link in it and another column where we can show a picture. Let's add the following code to our buidlTable.js file:
var buildLinkedColumn = function (title,value,link, width){
var field;
if (link){
field = new sap.ui.commons.Link();
field.bindProperty("text",value);
field.bindProperty("href",link);
field.setTarget("_blank");
} else {
var fieldValue = "{" + value + "}";
field = new sap.ui.commons.TextField({value:fieldValue});
}
return new sap.ui.table.Column().
setLabel(new sap.ui.commons.Label({text: title})).
setTemplate(field).
setWidth(width).
setSortProperty(value).
setFilterProperty(value);
}
var buildPlainColumn = function (title,value,width){
var fieldValue = "{" + value + "}";
return new sap.ui.table.Column({
label: new sap.ui.commons.Label({text: title}),
template: new sap.ui.commons.TextArea({value:fieldValue}),
sortProperty: value,
filterProperty: value,
width: width});
}
var buildColumnWithPic = function (title,piclink,width){
oImage = new sap.ui.commons.Image().bindProperty("src", piclink);
oImage.setWidth(width);
oImage.setHeight(width);
return new sap.ui.table.Column({
label: new sap.ui.commons.Label({text: title}),
template: oImage,
width: "60px"});
}
So we have now three variables called buildPlainColumn, buildColumnWithPic and buildLinkedColumn. Each of these variables will return an object of the type sap.ui.table.Column that is calculated in a function. The parameters provided to these functions will be used to bind the result of a JSON object to the table data. I'll explain this later in this blog.
Now let's add the creation of the DataTable itself to the code. We'll have three tables in our app. One showing a list of all tweets that have been persisted in our app, another one with a list of all hashtags and another one showing a list of tweet for a selected hashtag. We'll create another variable called buildTable that you give the table name as parameter. After that our buildTable.js file looks like this:
var buildTable = function(tableName){
// Only run through the code if a table name has been provided as parameter
if (tableName) {
// table with a list of all tweets
if (tableName === "allTweets" || tableName === "tweetsForHashtag") {
var oTable = new sap.ui.table.DataTable("table" + tableName, {
title : "Tweets",
width : "100%",
visibleRowCount : 5,
expandedVisibleRowCount : 10,
selectionMode : sap.ui.table.SelectionMode.Single,
editable : false
});
oTable.setRowHeight("50px");
oTable.addColumn(buildColumnWithPic("Picture","icon","48px"));
oTable.addColumn(buildLinkedColumn("Author","author","linkauthor","180px"));
oTable.addColumn(buildLinkedColumn("Tweet","tweet","linktweet"));
if (tableName === "allTweets") {
oTable.bindRows("allTweets");
}
if (tableName === "tweetsForHashtag") {
oTable.bindRows("tweetsForHashtag");
}
return oTable;
}
if (tableName === "allHashtags") {
var oTable = new sap.ui.table.DataTable("table" + tableName, {
title : "All Hashtags",
width : "150px",
visibleRowCount : 5,
expandedVisibleRowCount : 10,
selectionMode : sap.ui.table.SelectionMode.Single,
editable : false
});
oTable.addColumn(buildPlainColumn("Hashtag","hashtag","90px"));
oTable.bindRows("allHashtags");
return oTable;
}
return null;
}
else {
return null;
}
};
var buildLinkedColumn = function (title,value,link, width){
var field;
if (link){
field = new sap.ui.commons.Link();
field.bindProperty("text",value);
field.bindProperty("href",link);
field.setTarget("_blank");
} else {
var fieldValue = "{" + value + "}";
field = new sap.ui.commons.TextField({value:fieldValue});
}
return new sap.ui.table.Column().
setLabel(new sap.ui.commons.Label({text: title})).
setTemplate(field).
setWidth(width).
setSortProperty(value).
setFilterProperty(value);
}
var buildPlainColumn = function (title,value,width){
var fieldValue = "{" + value + "}";
return new sap.ui.table.Column({
label: new sap.ui.commons.Label({text: title}),
template: new sap.ui.commons.TextArea({value:fieldValue}),
sortProperty: value,
filterProperty: value,
width: width});
}
var buildColumnWithPic = function (title,piclink,width){
oImage = new sap.ui.commons.Image().bindProperty("src", piclink);
oImage.setWidth(width);
oImage.setHeight(width);
return new sap.ui.table.Column({
label: new sap.ui.commons.Label({text: title}),
template: oImage,
width: "60px"});
}
As the table for all tweets and the table of tweets for a specific hashtag provide the same columns, we only need on if-statement for both cases.
The code will first test which table name has been provided as a parameter. Depending on the parameter it will build a DataTable element that is returned from the calling instance.
We are ready with the preparations of our UI elements.
It's time to include the logic into our index.html file to make the UI elements show up in our app.
Show The UI Elements In Our App
There is not much we'll have to do. We need to be able to set the content for each of the tabs separately and need to ensure that the content for the first tab is pre-filled. So we'll have to add a little bit more code into our index.html file. This is how the index.html file looks like after adding that additional functionality. I've marked the added code in bold:
<!DOCTYPE HTML>
<html>
<head>
<meta http-equiv="X-UA-Compatible" content="IE=edge" />
<title>Tweets Persistence App</title>
<!--
Load the SAP UI5 library into the memory and set some meta information for it
like the libs you want to use and the theme you want to apply
-->
<script
src="./resources/sap-ui-core.js"
type="text/javascript"
id="sap-ui-bootstrap"
data-sap-ui-libs="sap.ui.ux3, sap.ui.commons, sap.ui.table"
data-sap-ui-theme="sap_goldreflection">
</script>
<script type="text/javascript" src="tools/buildTable.js"></script>
<script type="text/javascript">
// Create a SAP UI5 shell element
var oShell = new sap.ui.ux3.Shell("tweetAppShell", {
appIcon : "http://www.sap.com/global/images/SAPLogo.gif",
appTitle : "Tweets Persistence App",
});
// And now add so called WorksetItems to the shell
// Each WorksetItem consists in our case of a NavigationItem
// Notice that each Navigation Item is accessible via a unique key!
var WI = sap.ui.ux3.NavigationItem;
oShell.addWorksetItem(new WI({key : "wi_home", text : "All Tweets"}));
oShell.addWorksetItem(new WI({key : "wi_tweets", text : "Tweets Per Hashtag"}));
// Initialize the content variable
var aContent = {};
// Initialize the content for the first visible tab
oShell.setContent(getContent("wi_home"));
// Whenever a tab is selected in the sheet, set the content accordingly
oShell.attachWorksetItemSelected(function(oEvent) {
// get the key of the selected navigation item (built-in into the WorksetItem)
var itemKey = oEvent.getParameter("key");
oShell.setContent(getContent(itemKey));
});
// Just take the shell and place it in the html area called shellArea
oShell.placeAt("shellArea");
// content generation and buffering
function getContent(id) {
if (id == "wi_home") {
if (!aContent[id]){
aContent[id] = [buildTable("allTweets")];
}
}
if (id == "wi_tweets") {
if (!aContent[id]){
aContent[id] = [buildTable("allHashtags"), buildTable("tweetsForHashtag")];
}
}
return aContent[id];
}
</script>
</head>
<body class="sapUiBody" >
<!-- And here is the div element shellArea where the shell element will be posted to-->
<div id="shellArea"></div>
</body>
</html>
The first line that is bold loads the buildTable.js file into the memory so that we can use the code of it.
<script type="text/javascript" src="tools/buildTable.js"></script>
The next one initializes a variable that will contain the content we want to assign to each of the tab
// Initialize the content variable
var aContent = {};
To pre-load the content for the first tab we need this:
// Initialize the content for the first visible tab
oShell.setContent(getContent("wi_home"));
That code line calls a function called getContent that you give the unique key of the navigation tab. Depending on the id the getContent function will then return the corresponding content:
// content generation and buffering
function getContent(id) {
if (id == "wi_home") {
if (!aContent[id]){
aContent[id] = [buildTable("allTweets")];
}
}
if (id == "wi_tweets") {
if (!aContent[id]){
aContent[id] = [buildTable("allHashtags"), buildTable("tweetsForHashtag")];
}
}
return aContent[id];
}
The content is assigned only once to the tab. That's what the if statement takes care of that starts with if (!aContent[id]). Only if the content for a specific id (in our case the key of the navigation element) is not available, yet, it will be built. If you don't do that you'd re-create the same content again. This would lead into errors as the SAP UI5 library would notice that e.g. a table with the unique id tableallTweets is already available.
Filling the content variable has become pretty easy as we can re-use the function buildTable we've defined in buidlTable.js. We just say buildTable("xxx") and the table for xxx is created. The content of that table needs to be defined in one of the if statements of the function in the buildTable variable. That's all.
Finally we need another method to ensure that the content is really switched whenever the user selects an entry of the navigation bar. That's what this code here is for:
// Whenever a tab is selected in the sheet, set the content accordingly
oShell.attachWorksetItemSelected(function(oEvent) {
// get the key of the selected navigation item (built-in into the WorksetItem)
var itemKey = oEvent.getParameter("key");
oShell.setContent(getContent(itemKey));
});
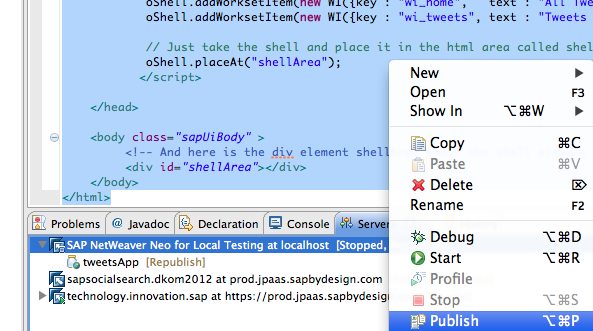
If not already done save not the index.html and the buildTable.js file and republish your changes to your local Neo instance. Et voila:


Pre-Fill Tables With Dummy-Data
We don't have any persistence, yet, in our app, but let's put some dummy data into our tables.
We'll add another function to our code that ensure the right data is available for each of our tabs. In this blog series I'll use JSON as data format, but you can easily change the code to make it also run with oData.
After adding the new function getTheRightModelData and adding some dummy data into the function our index.html file looks like this:
<!DOCTYPE HTML>
<html>
<head>
<meta http-equiv="X-UA-Compatible" content="IE=edge" />
<title>Tweets Persistence App</title>
<!--
Load the SAP UI5 library into the memory and set some meta information for it
<!DOCTYPE HTML>
<html>
<head>
<meta http-equiv="X-UA-Compatible" content="IE=edge" />
<title>Tweets Persistence App</title>
<!--
Load the SAP UI5 library into the memory and set some meta information for it
like the libs you want to use and the theme you want to apply
-->
<script
src="./resources/sap-ui-core.js"
type="text/javascript"
id="sap-ui-bootstrap"
data-sap-ui-libs="sap.ui.ux3, sap.ui.commons, sap.ui.table"
data-sap-ui-theme="sap_goldreflection">
</script>
<script type="text/javascript" src="tools/buildTable.js"></script>
<script type="text/javascript">
// Create a SAP UI5 shell element
var oShell = new sap.ui.ux3.Shell("tweetAppShell", {
appIcon : "http://www.sap.com/global/images/SAPLogo.gif",
appTitle : "Tweets Persistence App",
});
// And now add so called WorksetItems to the shell
// Each WorksetItem consists in our case of a NavigationItem
// Notice that each Navigation Item is accessible via a unique key!
var WI = sap.ui.ux3.NavigationItem;
oShell.addWorksetItem(new WI({key : "wi_home", text : "All Tweets"}));
oShell.addWorksetItem(new WI({key : "wi_tweets", text : "Tweets Per Hashtag"}));
// Initialize the content variable
var aContent = {};
// Initialize the content for the first visible tab
oShell.setContent(getContent("wi_home"));
getTheRightModelData("wi_home");
// Whenever a tab is selected in the sheet, set the content accordingly
oShell.attachWorksetItemSelected(function(oEvent) {
var itemKey = oEvent.getParameter("key");
oShell.setContent(getContent(itemKey));
getTheRightModelData(itemKey);
});
// Just take the shell and place it in the html area called shellArea
oShell.placeAt("shellArea");
// content generation and buffering
function getContent(id) {
if (id == "wi_home") {
if (!aContent[id]){
aContent[id] = [buildTable("allTweets")];
}
}
if (id == "wi_tweets") {
if (!aContent[id]){
aContent[id] = [buildTable("allHashtags"), buildTable("tweetsForHashtag")];
}
}
return aContent[id];
}
function getTheRightModelData(itemKey){
if (itemKey == "wi_home"){
var oModel = new sap.ui.model.json.JSONModel();
oModel.setData({
"allTweets":
[
{"icon": "rui.nogueira/avatar/46.png?a=1392", "author":"ruinogueira", "linkauthor":"https://twitter.com/#!/ruinogueira", "tweet": "Just started my blog series around #SAPUI5 and #Neo http://t.co/DIwHXsu8 #innojam", "linktweet":"http://twitter.com/#!/ruinogueira/status/192606455688474624"},
{"icon": "https://twimg0-a.akamaihd.net/profile_images/1281299036/portrait_reasonably_small.jpg", "author":"steinermatt", "linkauthor":"https://twitter.com/#!/steinermatt", "tweet": "@rhirsch @simondsap oh 'they' know for sure and we are working on it - won't be long :wink: - btw, lets go for #sapnwneo as hashtag", "linktweet":"https://twitter.com/#!/ruinogueira/status/194863564442443776"},
{"icon": "rui.nogueira/avatar/46.png?a=1392", "author":"ruinogueira", "linkauthor":"https://twitter.com/#!/ruinogueira", "tweet": "Working on my second blog post around #sapnwneo and #sapui5. Hope to get it done by end of this week.", "linktweet":"https://twitter.com/#!/ruinogueira/status/194863564442443776"},
]
});
if (itemKey == "wi_tweets"){
var oModel = new sap.ui.model.json.JSONModel();
oModel.setData({
"allHashtags" :
[
{"hashtag":"innojam"},
{"hashtag":"sapnwneo"},
{"hashtag":"sapui5"}
],
"tweetsForHashtag" :
[
{"icon": "rui.nogueira/avatar/46.png?a=1392", "author":"ruinogueira", "linkauthor":"https://twitter.com/#!/ruinogueira", "tweet": "Just started my blog series around #SAPUI5 and #Neo http://t.co/DIwHXsu8 #innojam", "linktweet":"http://twitter.com/#!/ruinogueira/status/192606455688474624"},
{"icon": "rui.nogueira/avatar/46.png?a=1392", "author":"ruinogueira", "linkauthor":"https://twitter.com/#!/ruinogueira", "tweet": "Working on my second blog post around #sapnwneo and #sapui5. Hope to get it done by end of this week.", "linktweet":"https://twitter.com/#!/ruinogueira/status/194863564442443776"},
]
});
sap.ui.getCore().setModel(oModel);
}
}
</script>
</head>
<body class="sapUiBody" >
<!-- And here is the div element shellArea where the shell element will be posted to-->
<div id="shellArea"></div>
</body>
</html>
In the function getTheRightModelData you can see how the JSON data fields connect to the fields we've used in our buildTable.js file.E.g. with oTable.bindRows("allTweets") in the buildTable function you tell the DataTable that it gets its datasets from the JSON variable "allTweets" we've defined in the getTheRightModelData function. The actual columns of our tables connect to the field names in the corresponding JSON object.
Pretty straight forward.
At the end we just need to ensure that whenever we select another tab we get the corresponding data. That's what we need the other two lines for I've added to the code for attachWorksetItemSelected
// Whenever a tab is selected in the sheet, set the content accordingly
oShell.attachWorksetItemSelected(function(oEvent) {
var itemKey = oEvent.getParameter("key");
oShell.setContent(getContent(itemKey));
getTheRightModelData(itemKey);
});
and after setting the content for the first visible tab:
// Initialize the content for the first visible tab
oShell.setContent(getContent("wi_home"));
getTheRightModelData("wi_home");
Enjoying The First Results
Let's republish our code again to the local Neo instance and we finally see some data in our app


The End Of Blog Number 2
Of course there is still a lot to do in order to get a really functional app. We haven't talked about persistence, yet, and the table to show the related datasets for a hashtag is not working, too.
But you've learned how easy it is to create a nice looking prototype for an SAP UI5 app. You've also learned how to map a DataTable object to JSON data read-in by the SAP UI5 dataModel and also how you can use different UI elements withing such tables.
With the code for the buildTable.js file and index.html file in this blog you can easily try out this blog yourself. Have fun.
To be continued
In my next blog series I'll show you how to use the persistence layer of Neo and how to access the data from within our app. We'll not only read data, but also write data back to the persistence layer.
I hope you've enjoyed this blog and where able to follow it with some "aha" moments. For me those moments are the most important ones because they motivate to try out more and to suddenly have another idea on how to leverage other technologies and other know-how, too.
In case you find out something is wrong or would do things different, just post as a comment to this blog.
This is useful for the community and highly appreciated by me.
You can also ping me directly via my Twitter user ruinogueira.
Oh! One more thing: don't forget to rate this blog (and all the others coming in the next weeks and months) so that I can see if you find it helpful or not.
Best,
Rui
22 Comments
Related Content
- How create a plugin session timeout with a countdown timer in SAPUI5 Launchpad with backend server? in Enterprise Resource Planning Q&A
- Consuming SAP with SAP Build Apps - Mobile Apps for iOS and Android in Technology Blogs by SAP
- Composite Data Source Configuration in Optimized Story Experience in Technology Blogs by SAP
- SAPUI5 UploadSet camera access not working on surface in Technology Q&A
- Fiori Smart Table in Technology Q&A