Introduction: We can do UI level Personalization in Web Dynpro java application by CTRL+Right click on the iView preview page at PCD level.
In case of ABAP Web Dynpro application we can use “Application Configuration/Component Configuration” for the UI level personalization.(Please refer the below steps)
1.Open the ABAP Web Dynpro application in ECC using SE80 t-code. Expand the node ”Web Dynpro Application” .Right click on the application name (in this example Y_WEDDYNPRO_1) and select “Create/Change Configuration” from the context menu as shown in the below screen shot.

2.Give the configuration name in the “Configuration Id “ field and click on “create” button as shown in the below screen shot.

3.Provide the “Description” and “Package” information and click on “OK” button as shown in the below screen shot.

4.It will show the successful Application Configuration creation message as shown in the below screen shot.

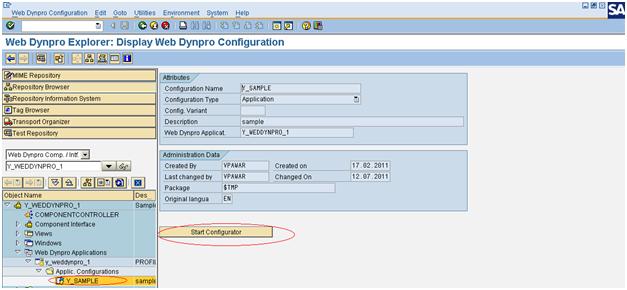
5.Now we can see the Application Configuration name inside the “Web Dynpro Application” node .open the application configuration by double click on it and click on “Start Configurator” button as shown in the below screen shot.
6.It will open Application Configuration browser as shown in the below screen shot. Click on “Change” button.

7.Now click on “Go To component Configuration” as shown in the below screen shot.

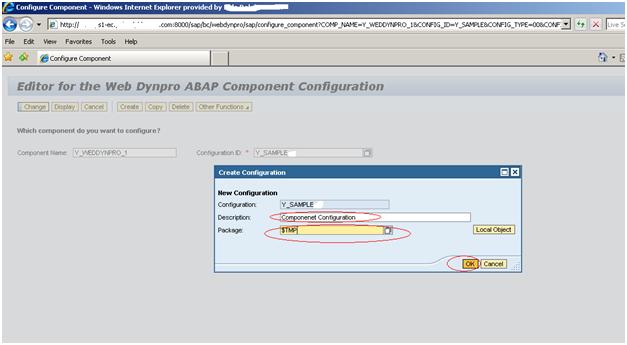
8. It will Open ABAP Component Configuration editor in a browser. Give the Component Configuration Id name and click on Create as shown in the below screen shot.

9. In the pop up window give the Description and Package information and click on Ok button as shown in the below screen shot.
10. Successful creation of Component Configuration message will be shown as shown in the below screen shot.

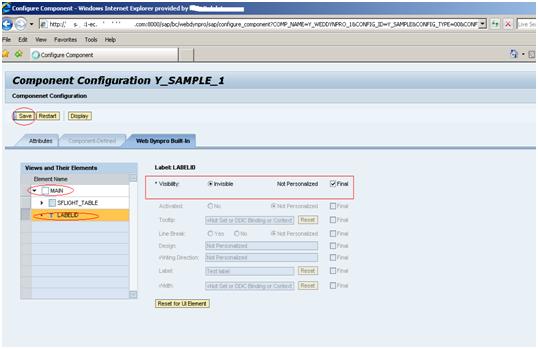
11. Go to the tab “Web Dynpro Built In”, where we can personalize the UI element of ABAP Web Dynpro Application.
Expand the node ”MAIN” (Default Container name) and click the UI element (in this example we have personalized the “Label” UI element) , then select the radio button “Invisible” and Check Box “Final” and click on Save as shown in the below screen shot.
12.It will show the successful save message.

13.If we want to reset the personalization then open the Component Configuration browser once again, Go to “Web Dynpro Built-in” tab .You can select the “Not Personalized” radio button and uncheck the check box “Final” and save the changes as shown in the below screen shot. It will show the successful save message as shown in the below screen shot.

14.In order to see the above personalization done at ECC on portal, we need to pass the configuration name in the ABAP Web Dynpro iView property editor for the property field “Configuration Name” as shown in the below screen shot.

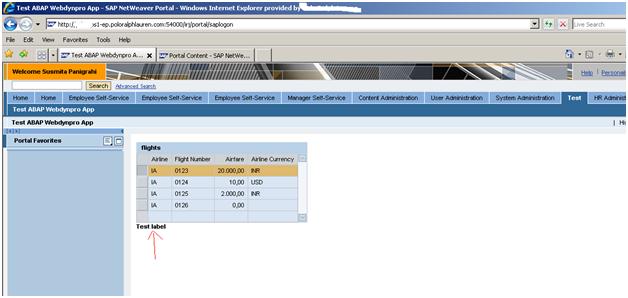
15. Below screen shot shows the Web Dynpro ABAP Application in Portal where the “Label” UI element is visible.(In this example it is Test Label).
16.After Personalization of “Label” UI Element at ECC end using Application and Component configuration we are not able to see this UI element as shown in the below screen shot.

