
- SAP Community
- Groups
- Interest Groups
- Application Development
- Blog Posts
- Step by Step Installation of SAP NetWeaver 7.01 SR...
Application Development Blog Posts
Learn and share on deeper, cross technology development topics such as integration and connectivity, automation, cloud extensibility, developing at scale, and security.
Turn on suggestions
Auto-suggest helps you quickly narrow down your search results by suggesting possible matches as you type.
Showing results for
faisal_altaf2
Active Contributor
Options
- Subscribe to RSS Feed
- Mark as New
- Mark as Read
- Bookmark
- Subscribe
- Printer Friendly Page
- Report Inappropriate Content
08-19-2010
9:08 AM
Step by Step Installation of SAP NetWeaver 7.01 SR1 SP3 ABAP Trial Version in Oracle VirtualBox Part...
Step by Step Installation of SAP NetWeaver 7.01 SR1 SP3 ABAP Trial Version in Oracle VirtualBox Part...
Downloading and Installing Virtual Box
Click here for Downloading Oracle Virtual Box
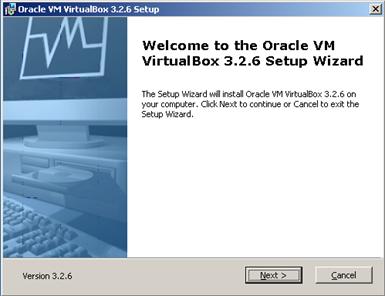
1. Run the .exe file after downloading. After running this, you will get the following first installation window.
2. Below Screen for End-User License Agreement will appear when you check the next button from the above screen

3. After Selecting next from the above Screen you will get the below one from where you can select or unselect installation components by default all are going to install, you can also change the path from this screen but I am going to install on default path and selecting all components to install.

4. Below Screen will appear after the above one. From this screen you can select the Shortcuts as i have selected for both Desktop and Quick Launch Bar

5. After selecting next from above window you will get following one with the Warning message, means if you are Browsing, doing some downloading or copying data from local network it will temporally stop this because it will reset network connection for few seconds, so be sure that you are doing nothing with network.

6. When you select Yes from above screen the following ready to begin Installation window will appear. Now you can select Install Button to start Installation.

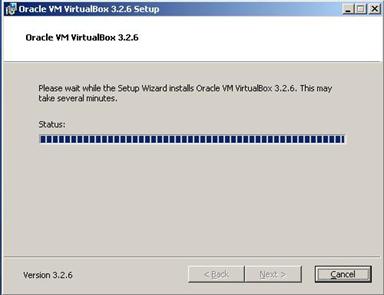
7. After selecting Install button you will get the above progress installation window and you may get the following message for 3 or more times you have to select the Continue Anyway button every time.

8. You have done with Installation now. when you select the Finish button from the below screen with the Check Box Checked Start Oracle VM VirtualBox 3.2.6 after installation. VM will start Automatically or you will have to start it using the shortcut you created.

Creating Virtual Machine
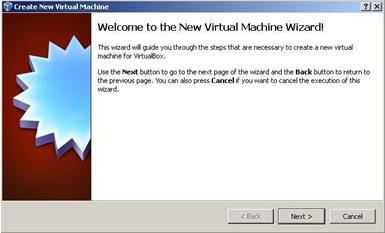
1. From below initial screen of VM you have to select the New button appearing top left under menu bar, you can select it from menu path Machine --> New or you can also use short cut Ctrl + N

2. After selecting New Button you will get the following Welcome windows. Select Next button from this window.
3. From below windows VM Name and OS Type as i am selecting
Name as Windows Server 2003 for SAP MINI
Opreating System as Microsoft Windows
Version as Windows 2003
Note: You can also installl MINI SAP on Windows XP but I am installing on Windows Server 2003.

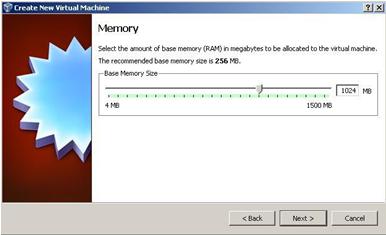
4. After selecting Next from above windows you will get the following one from where you can select Memory (RAM) for you VM. Your system must have 2 GB Physical RAM from that 2 GB you can assign to VM 1.25 GB or 1 GB too.
Note: if you will give 1 GB (1024 MB) you may will get message for low memory while installing MINI SAP but you can ignore this message because I have experienced with to install with one GB on VM and it works.
5. Below is the window that will appear after the above one it is about the Virtual Hard Disk Select Check Box Create New Hard disk and go to next Screen using Next Button.

6. Press next for appearing window after the Welcome Create New Virtual Disk Wizard

7. There are two type of Virtual Hard disk Dynamically expending storage and Fixed-size storage. Here we will select 1st one (Dynamically expending storage) and Press Next button.

8. From the below window you can select the Virtual Disk Location and Size we will select the Physical drive where minimum 40 GB of free disk space is available. Because we will copy about 3.5 GB Setup files in it too. You have to select the Virtual Disk Size more than 50 GB as I am selecting 1.01 TB.

9. From the following Summary window conform about the Location of Virtual Disk on you Physical Hard disk and select Finish.

10. A new entry will appear will the Provided VM Name in the list as shown in screen below, on the right hand side it is showing the settings of that VM. Now you will have to change some setting for this we can click on the Heading appearing as Blue or we can check the Setting button appearing right to New button.

11. In the Setting (tab or window) we will see the Boot Order adjust it as shown below.

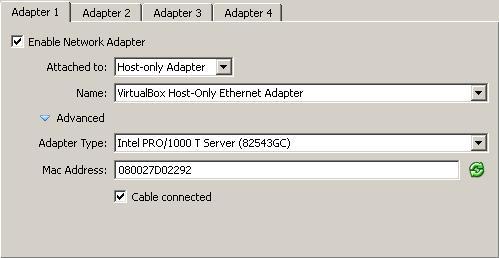
12. In Network (tab or window) we have to set the setting as shown below.
13. In Storage (tab or window) we have to assign Physical CD/DVD Drive which have Bootable Windows Server 2003 CD/DVD (because I have two Drives in my system so it is showing as two select the one having windows CD/DVD), you can also assign a ISO Image of Windows using the Yellow button just right side of the CD/DVD Dropdown menu shown Below.

14. Now Select the Start Button showing in the Step 10 Screen just right side of the Setting button. Our system is starting now.

15. It will Boot from CD/DVD/ISO Image and now we have to follow the windows installation steps, below is the first one we will press enter from the Keyboard.

16. Read and Press F8 for User Licensing Agreement from Below Screen.

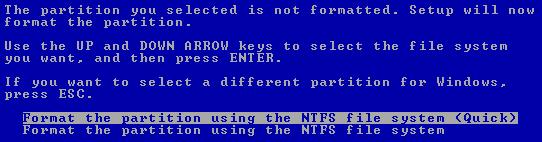
17. Now follow the Steps (18 to 20) below for Creating and formatting the partition.

18.

19.

20. We will do Quick format as selected below
21. As shown below setup has start it is copying files.

22. After Restart you will see the below Screen no need to do any change here so press Next for go to next Step.

23. Give User and Organization in below window

24. On Screen below no need to do any change, so press Next for go to next Step.

25. Hostname must not exceed 13 characters, like me giving MINISAP below

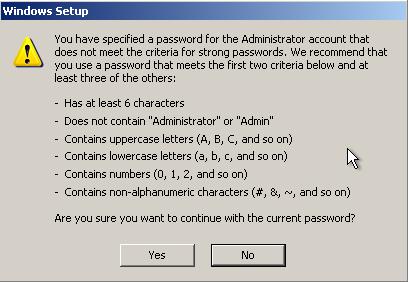
26. In case of Simple Password we can get the below message if want to change the password Press No and if Continue using the same then Press Yes,
27. Select Data and Time Settings in Below Screen

28. Press Next Button with Typical setting Radio button selected.

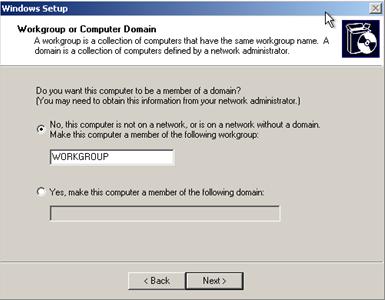
29. leave the workgroup same or you can do change accordingly.
30. After Selecting Next Setup Starts again like following screen.

31. Finally after restart the following window appear because it is in VM so you will not Press Ctrl + Alt + Delete to login but you will use Right Ctrl + Delete

32. Follow steps from here to 39 for Installing VM Additions for better move to the screen of VM and Physical Machine.
Note: in the screen below Host + D Host mean Right Ctrl Key

33. When we will select the option above we will see the setup start as below sometimes it will not start Automatically, in this case we have to go to My Computer and open CD ROM of VM (In CD/DVD of VM you will find a loaded ISO) open it and run setup from there.

34.

35.

36.

37. You may will get the below warning message for few time always click the button Continue Anyway

38. Following Security Alert may also come in this case Select Yes

39. Finally Select Finish Button to Restart your VM.

40. Follow the Steps Below to share the host Drive or Folder for VM. Right Click on the Icon as highlighted in the below screen shot and select Shared Folders When you will select this option window in the step 41 will appear.
Note: I have experienced many times for running setup from network and found it end with error so I strongly recommend you to copy the setup files in the local Hard Disk of VM.
![]()
41.From the Shared Folders window select Add button, after selecting this button you will get the Add Share Small window, from this window you can select the Drive or Folder you want to show in VM.

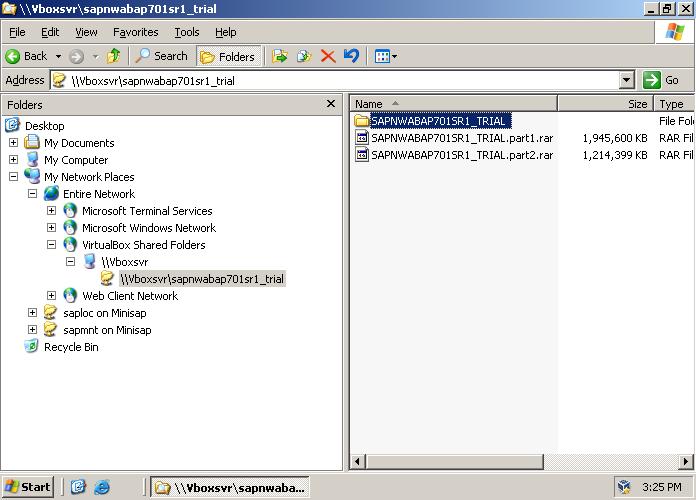
42. You can go to the Shared Folder or Drive using the below path from My Network Places. From here you can copy past in your Local Drive.
Click here for downloading (SAP NetWeaver 7.01 SR1 SP3 ABAP Trial Version)
- SAP Managed Tags:
- ABAP Development
9 Comments
You must be a registered user to add a comment. If you've already registered, sign in. Otherwise, register and sign in.
Labels in this area
-
A Dynamic Memory Allocation Tool
1 -
ABAP
8 -
abap cds
1 -
ABAP CDS Views
14 -
ABAP class
1 -
ABAP Cloud
1 -
ABAP Development
4 -
ABAP in Eclipse
1 -
ABAP Keyword Documentation
2 -
ABAP OOABAP
2 -
ABAP Programming
1 -
abap technical
1 -
ABAP test cockpit
7 -
ABAP test cokpit
1 -
ADT
1 -
Advanced Event Mesh
1 -
AEM
1 -
AI
1 -
API and Integration
1 -
APIs
8 -
APIs ABAP
1 -
App Dev and Integration
1 -
Application Development
2 -
application job
1 -
archivelinks
1 -
Automation
4 -
BTP
1 -
CAP
1 -
CAPM
1 -
Career Development
3 -
CL_GUI_FRONTEND_SERVICES
1 -
CL_SALV_TABLE
1 -
Cloud Extensibility
8 -
Cloud Native
7 -
Cloud Platform Integration
1 -
CloudEvents
2 -
CMIS
1 -
Connection
1 -
container
1 -
Debugging
2 -
Developer extensibility
1 -
Developing at Scale
4 -
DMS
1 -
dynamic logpoints
1 -
Eclipse ADT ABAP Development Tools
1 -
EDA
1 -
Event Mesh
1 -
Expert
1 -
Field Symbols in ABAP
1 -
Fiori
1 -
Fiori App Extension
1 -
Forms & Templates
1 -
IBM watsonx
1 -
Integration & Connectivity
10 -
JavaScripts used by Adobe Forms
1 -
joule
1 -
NodeJS
1 -
ODATA
3 -
OOABAP
3 -
Outbound queue
1 -
Product Updates
1 -
Programming Models
13 -
Restful webservices Using POST MAN
1 -
RFC
1 -
RFFOEDI1
1 -
SAP BAS
1 -
SAP BTP
1 -
SAP Build
1 -
SAP Build apps
1 -
SAP Build CodeJam
1 -
SAP CodeTalk
1 -
SAP Odata
1 -
SAP UI5
1 -
SAP UI5 Custom Library
1 -
SAPEnhancements
1 -
SapMachine
1 -
security
3 -
text editor
1 -
Tools
16 -
User Experience
5
Top kudoed authors
| User | Count |
|---|---|
| 6 | |
| 5 | |
| 3 | |
| 3 | |
| 2 | |
| 2 | |
| 2 | |
| 2 | |
| 1 | |
| 1 |