Is your organization a Windows shop? Do you have a lot of shared folders with many users and groups? Is it painful to manage these folders access control lists (ACLs)? Why not leverage your current IdM to help with the task of setting the file/folder system security option? As you already know, SAP NW IdM provided you with a framework that you could do many things. So the only thing that we need here is how to set the permission option on the folder/file itself. In this blog, I will show a method to extend the current framework to make this possible.
So what would you need to make this possible? As I stated earlier, the out-of-the-box solution can already manage group assignment and provision user for the ADS so we will only need to add a 3rd party software to be able to set the access control for the folder/file. Here are some of the high level systems/software’s you would need to test or enable this scenario:
- SAP NW IdM – I will assume that you’ve already had this setup and run with the ADS user/group already imported into SAP NW Identity Store.
- Access to the share repository server – during this demo/blog, I will be using a simple share directory on windows 2003 server
- Access to install a SAP NW IdM dispatcher – I will follow the SAP installation option from the guide
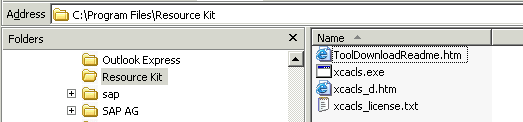
- Access to install a 3rd party tool – There are many 3rd party tools out there that would handle the ACLs setting easily but as an example I will be using a program that come with the Windows Resource Kit which can be downloaded from the Microsoft website. The program name is “XCacls” which have the ability to set the access right for the folder/directory.
The “XCacls” program has all the necessary option to allow you to change/set whatever value you would need for the file/folder. Below are the options of the permission setting that this program can handle:
- R Read
- C Change (write)
- F Full Control
- P Change Permissions (special access)
- O Take Ownership (special access)
- X Execute (special access)
- E Read (Special access)
- W Write (Special access)
- D Delete (Special access)
So now that we have all the software components and user/group, we just need to put this into practice and create a job that would enable us to set the permission. Now let’s get started on this scenario, below are the high level steps:
Landscape for the scenario
- vmphlrigwj – SAP NW IdM
- vmphlrig031 – Windows 2003 repository
- “E:\share” is the share folder
Installation of SAP NW IdM Dispatcher
Create a dispatcher script for a new windows dispatcher in SAP NW Identity Center
Install a SAP NW IdM dispatcher on the share repository (Please follow the installation guide for this)
Copy the script and property file over to the new dispatcher installation server
Startup the dispatcher to ensure it working and connect back to the Identity Store correctly
Installation of Window Resource Kit Tools
Remember the installation directory
Create a VBscript in the SAP NW Identity Center
Expand the “Management” folder and go to the “Global scripts” node
Create a new script and give it a name something like “set_ACLs_permission”
Copy and paste the example code into the script
Code Example
     Dim exeCmd
     Dim oShell
     Dim userID
     userID = Par
     exeCmd = """C:\Program Files\Resource Kit\xcacls.exe"""
     Set oShell = CreateObject ("WScript.Shell")
     oShell.exec exeCmd & " E:\share /E /G " & userID & ":F /Y"
     Set oShell = Nothing
Create the SAP NW IdM Job
Create a new “Action task” and select an “Empty job…” option
Enable the job and select the dispatcher that you just created earlier
Set the “Runtime engine” to “Windows”
Set the “Script language” to “VBScript”

Link the global script to the job
Create a new pass and select “to ASCII file”
Call the script and pass in the userID
Test the provision task with a user
Now that we’ve got everything in place, we can start with a simple provision test. Below are the before/after result of provision run:
Before: 
After: 
Audit Log of the task: 
Conclusion
As you can see, it is very simple to extend the current SAP NW IdM to fit your needs. The above scenario is the very basic but you can extend this scenario even further by creating task that would allow you to pass in directory name, etc.