This blog entry will show the configuration of Integrated Excel Planning that will help in uploading plan data against WBS's from Excel sheet. I searched around on this topic for a while and never found a complete configuration guide on Excel Integration. The blog explains all steps right from creation of planning layout to uploading plan values. Though the example used in uploading the plan values against WBS elements, steps would be similar for other CO objects like., IO and cost Centres.
Introduction
For planning with integrated Excel, Microsoft Excel is used as a planning screen for your planning data in the SAP System. This allows you to combine the comfort of Excel's formatting and data processing functions with the powerful planning functions of your SAP application. You are therefore able to use the Office input interface with online planning in the SAP System. There are two ways of using Excel to plan your data:
- Planning with Excel integrated into the user interface of the SAP System
Excel replaces the standard SAP planning screen. This enables you to plan using the functions of both the SAP System and Excel.
- Offline planning in Excel and uploading data into the SAP System
From one or more PCs that are not connected to the SAP System, you can enter your planning data into several Excel spreadsheets. This data can then be uploaded into the SAP System, where you can process it further using the SAP planning functions.
We are going to proceed with below steps:
- Creation of Planning Layout.
- Creation of Planner Profiles.
- Offline Planning in Excel and uploading the values.
All of these are can be done by a functional consultant, so let us start with the configuration.
Creation of Planning Layout
Here we create a planning layout copying an existing layout. The layout is created to upload plan values against WBS and Cost Element.
Enter T Code OPO1.

Option to Create/Change/Display planning layouts appears.
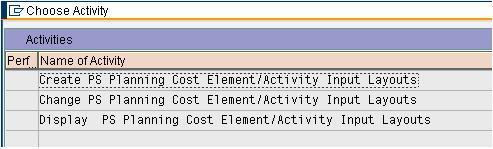
Double click on Create PS Planning Cost Element/Activity Input Layouts to create one. Copy the Planning layout 1-701 and mention the planning layout 'SDNWBS' and click on Create.

All details of the referenced layout 1-701 are copied into SDNWBS layout.

Here we amend the copied layout to our requirement. So delete the elements/columns that are not required.
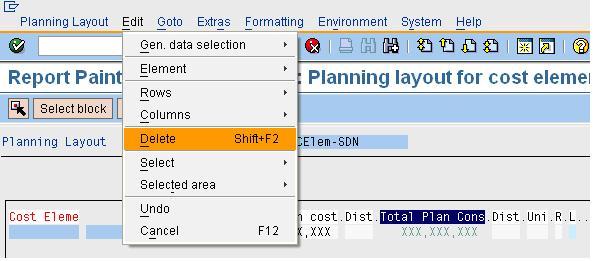
Similarly delete the other columns and now we are left with Cost Element (characteristic values) and Total Plan value (key figure).

Now we add the WBS element as one of the lead column value. We do this by moving out the WBS from the general data selection and use it as lead value in layout. But before that click on New lead column, this inserts a column which will be edited to use WBS element as a characteristic value.

Move the WBS element into available characteristics

Perform the check and confirm. There should be no errors here.

Change the lead column element.

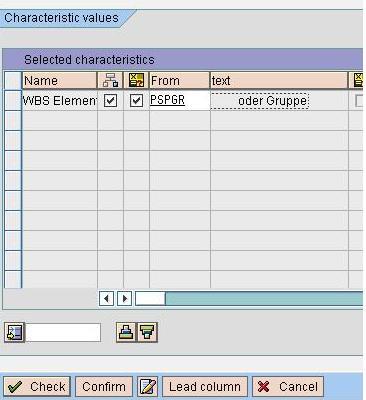
Move the WBS element from Available characteristics to left.

Mention the variable and other details of the selected characteristics as shown and then perform the check and confirm. No error should be observed here.
For the lead column set the option to display the WBS element along with the description, this help pulls up the description of WBS into planning layout.

Planning Layout is complete now. Save the layout! Layouts are transportable.

Creation of Planner Profiles.
Here we create a planner profile that uses the layout created above. Settings for Excel Integration are done here.
T Code KP34.

Double click on Create User-Defined Planner Profiles

Create New Entries.

Mention the name and description of the profile.

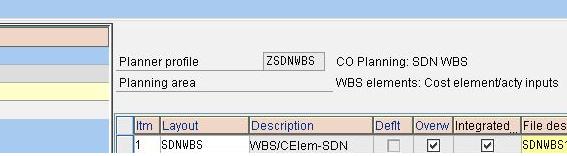
Under the General Controlling screen enter the planning area as shown below.

Under the layout for controlling screen create new entries to mention the layout created earlier and mention a file description. Ensure to check Integrated as this allows excel integration. System might issue a warning, ignore it.
Under the Default parameters screen mention the default parameters (to bypass the standard system checks for generating the excel file name) and click on overview icon to open the planning layout in Excel.

Open the Planning layout with 'Enable Macros'

The planning layout in opened Excel with the default parameters mentioned.

Save the Excel layout and just be sure save the file and save the file description.


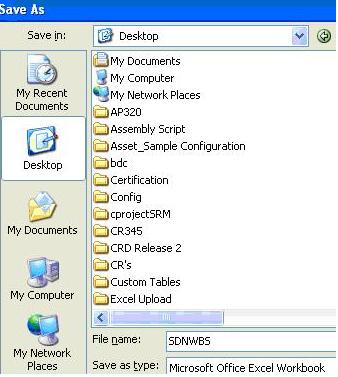
Under the Excel application choose 'File' and 'Save as' to save template onto the desktop. This allows offline planning and later uploading the values.
Exit the planner profile setup saving the preset parameters.

Save the planner profile and with we are done with the configuration.

Offline Planning in Excel and uploading the values.
Now that we the configuration in place, we choose/set the configured planner profile using the T Code KP04.

Open the Excel template saved on the Desk top and complete the planning. The Excel sheet opened is usually write protected, so undo the protection, complete the planning and save the Excel. After we are done and satisfied with the Excel Sheet planning, the file needs to be save/converted into text file for uploading. Note we are trying to load values against 2 different WBS in different projects.

Use T code CJR2. From Menu choose Extras>Excel Planning>Upload.

Mention the Path of the file, File description (as mentioned in the planner profile) and executed.

That's it. The log confirms the values have been successfully uploaded.

In CJR2, instead of Excel planning, you can still do normal way of planning but the layout is in Excel now.
Plan Values as viewed on any standard WBS report.

Excel upload has few limitations on the number of records that can be uploaded in a single file.
Related OSS Notes 698010,499152,489867,416387,391316 & 397799
This is my first blog! Expect your feedback be it negative or positive.
