Developing a J2ME Application would require you to download Sun Java Wireless Toolkit, also called as Java 2, Micro Edition (J2ME) Wireless Toolkit. This can be download from the following link.
After the installation is complete, we'll follow the same typical J2ME development procedure, as follows:
- Create the project.
- Write the source code.
- Compile and preverify the code.
- Run the MIDlet.
Now, let's get to it.
In the group of new J2ME installation, open the KToolBar.
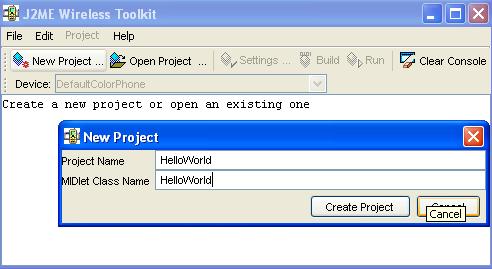
We begin by creating a new project in the J2ME Wireless Toolkit, as follows:
- Click New Project
- Enter the project name and MIDlet class name, as shown in figure below.
- Click Create Project.
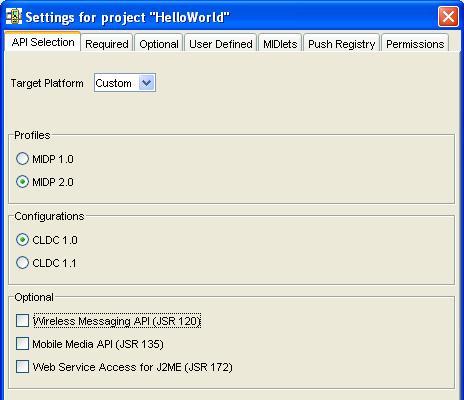
- Select the Profile as MIDP 2.0 and Configuration as CLDC 1.0 and click OK to complete this step as shown in figure below.
You would find a new project folder namely "HelloWorld" created in the directory path > WTK21\apps.
Next, copy and paste the following code into a text editor and save the file in the path:\WTK21\apps\HelloWorld\src.

Following is the code for a simple MIDlet. This MIDlet will display a TextBox, which is a multiline, editable field. There will also be a button on the display to exit the MIDlet.
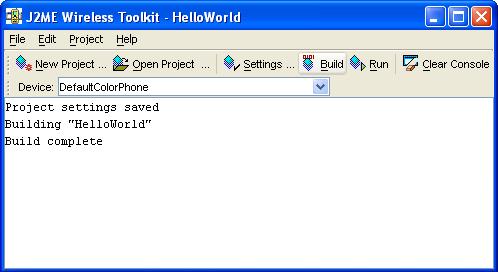
Build the project using the J2ME Wireless Toolkit. This shall compile as well as preverify the code.
A short note about preverification
If you come from a background of writing code with J2SE, then preverification may not be familiar to you. Given the memory limitations on mobile devices, preverification was devised to limit the amount of overhead to run applications on a mobile device. Rather than verifying code solely at run time, MIDlets go through a preverification step during the development cycle, which reduces the resource and memory consumption necessary when starting a MIDlet.
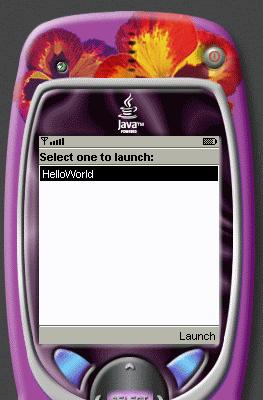
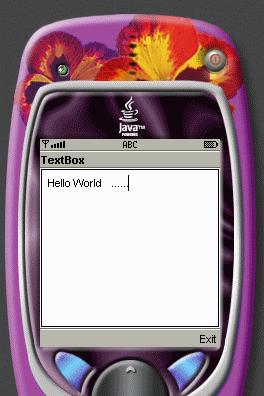
Now run the project.
You shall first need to Launch the application by clicking the Launch soft-button and next shall be the display screen which we have developed. It consists of a Editable Textbox with predefined values.
In this blog, we learned the procedure to create and run simple J2ME applications. In the next blog, I intend to discuss the Connection framework in J2ME to connect to the web server.
